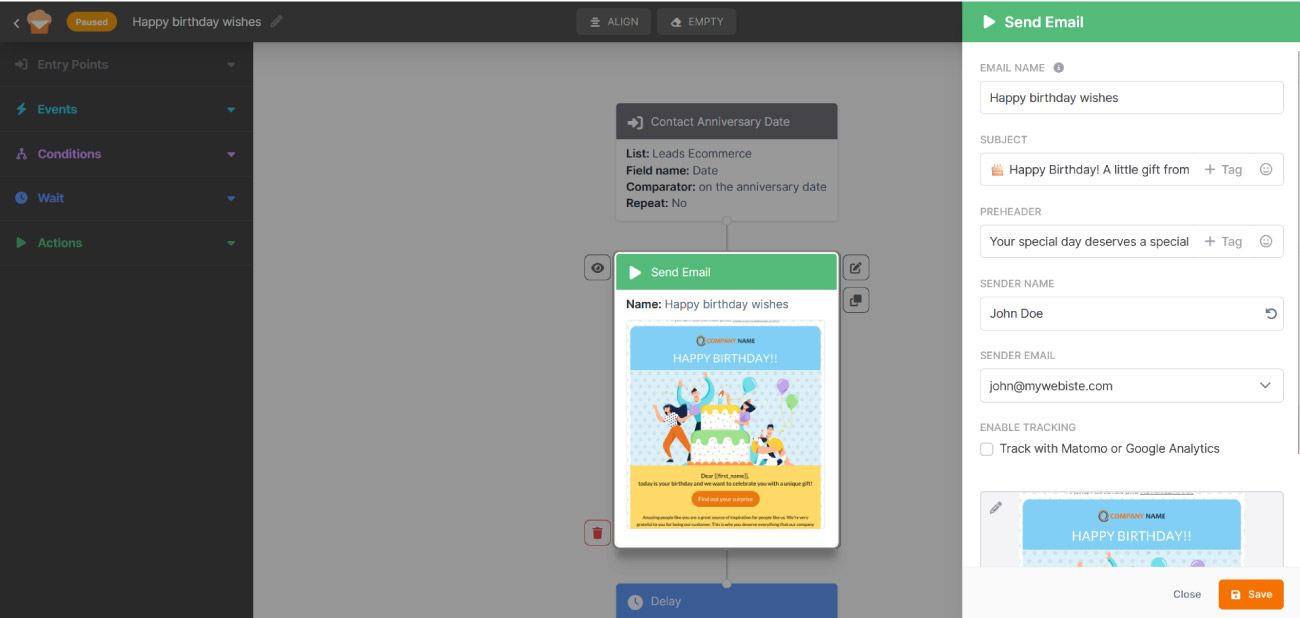
In Emailchef, email automation workflows are called Flows. A Flow is a sequence of automated actions that are triggered one after another based on rules you define. Each automation is represented visually as a diagram.
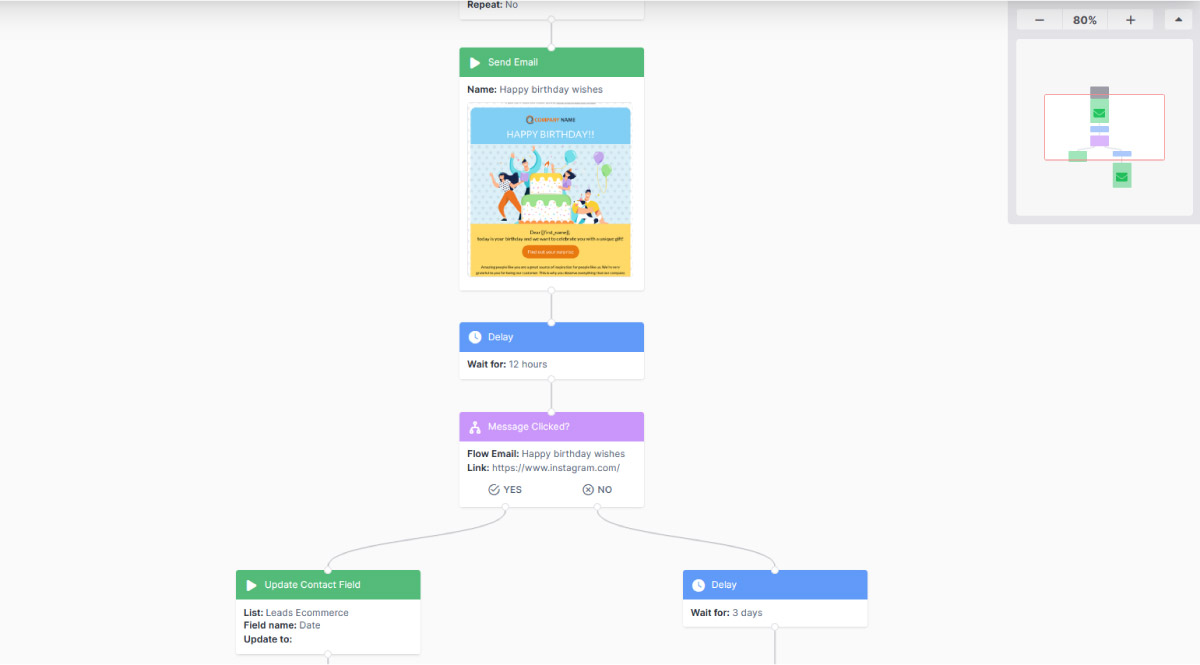
Each Flow is made up of five types of elements:
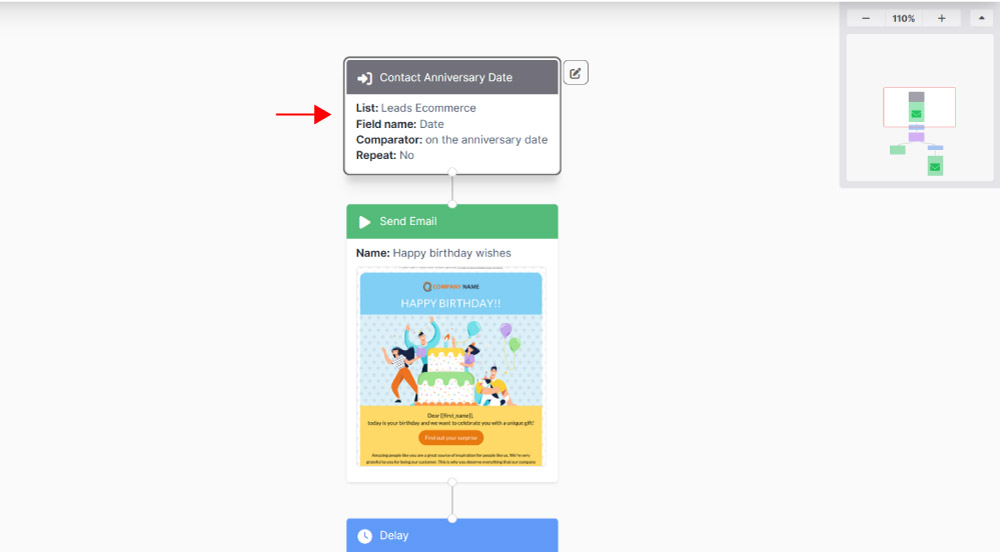
- Entry points: define the condition that brings a contact into the Flow, for example, subscribing to a list, opening an email, or an inbound API call.
- Events: check whether a specific action has occurred and move the contact through the workflow accordingly.
- Conditions: allow you to branch the Flow based on the contact’s characteristics or behaviour.
- Wait: introduces a pause between one action and the next.
- Actions: define what happens to the contact at each step (sending an email, updating a field, moving them to another list, unsubscribing them, and more).
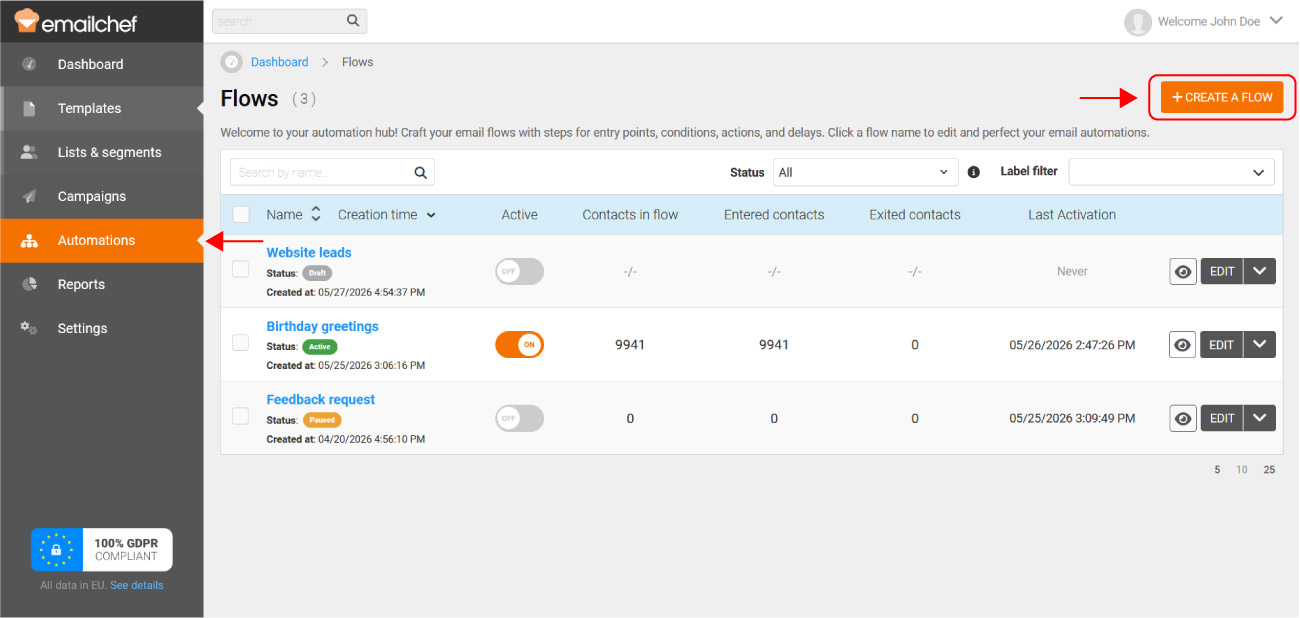
To create a Flow, log in to Emailchef and select Automations from the left sidebar. Then click + Create a Flow in the top right corner.
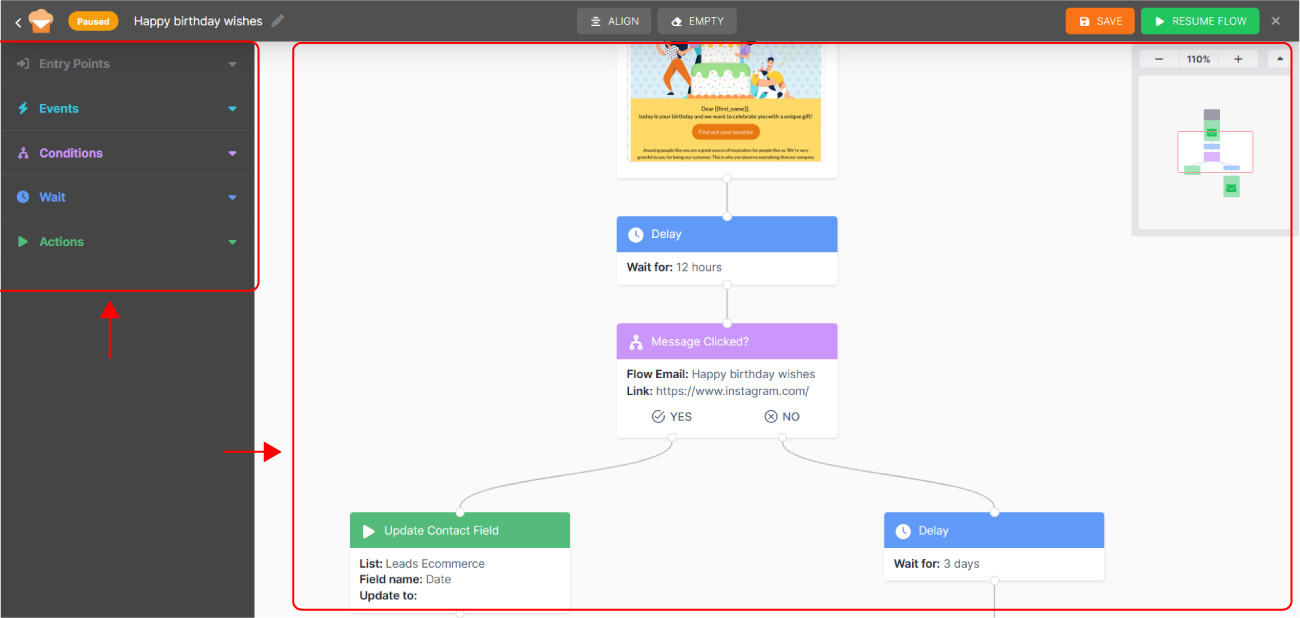
Add the remaining elements in the order you prefer: you can place them at the end of the Flow or insert them between two existing blocks. To configure an element, double-click on it or click Edit properties.