How to create a subscription form with Emailchef.
As I mentioned earlier, there are several ways to create a subscription form with Emailchef. You can choose between the following types of forms:
- Popup;
- Inline;
- on an external landing page.
Now, I’ll explain how to create them step by step.
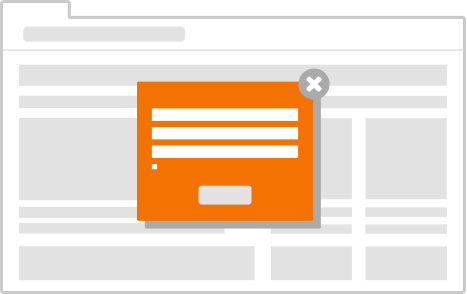
1. Pop-up form
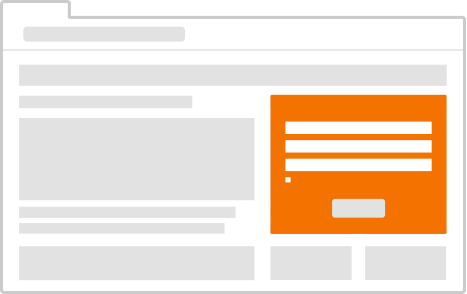
This subscription form will appear as a window in the middle of the screen while browsing your website (on selected pages and at the desired time).
To create one, click on ‘Lists and Segments’ found in the left sidebar of your dashboard.
Next, select the list you want to associate with the form and click on ‘Sign-up Forms’.
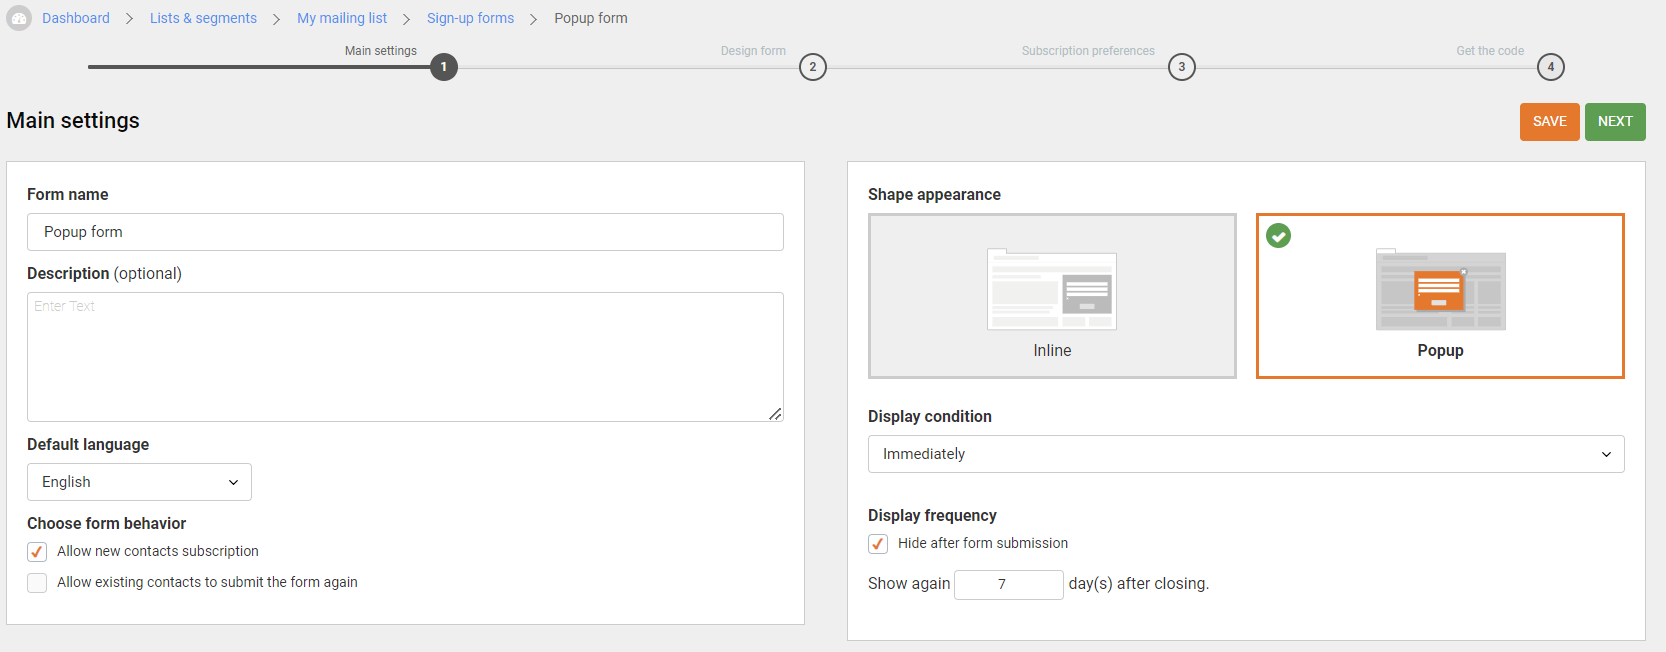
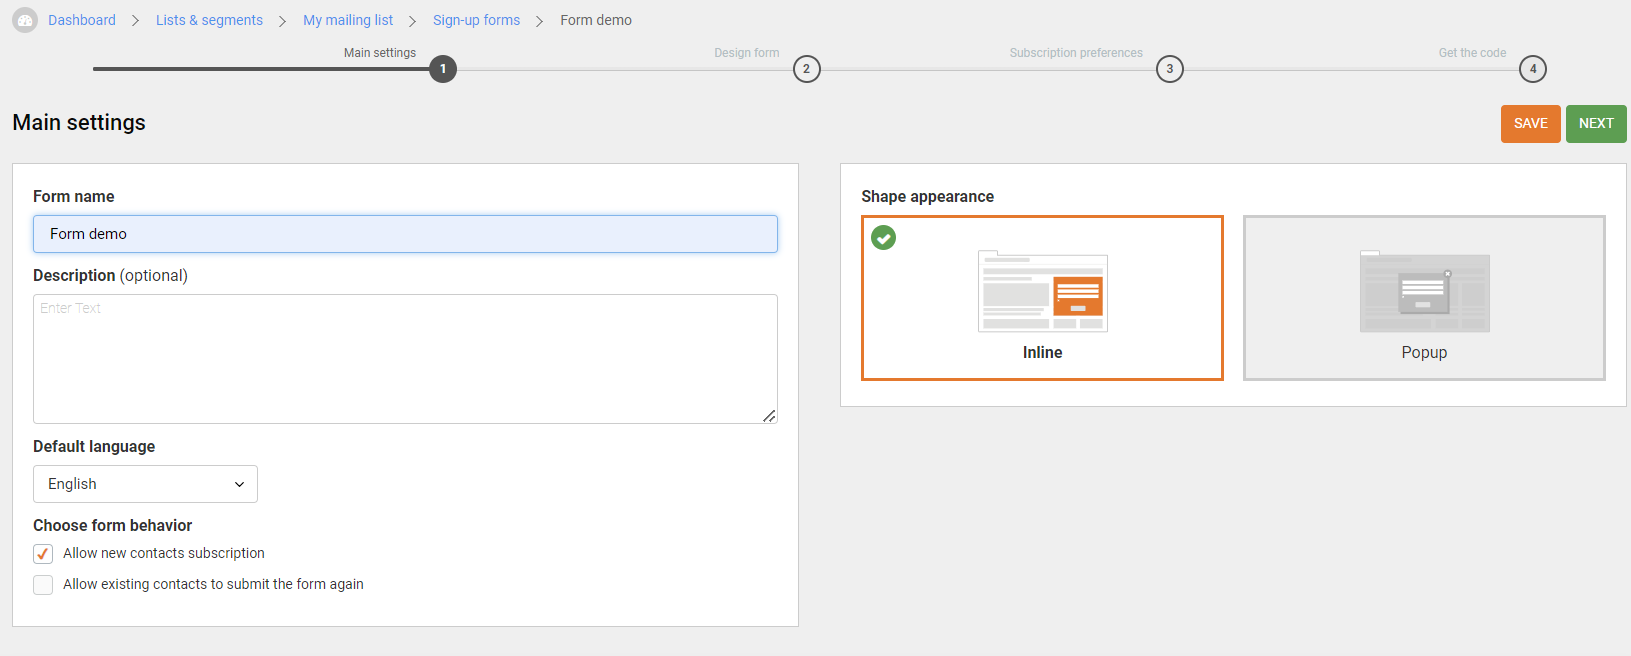
Click on ‘Create a sign-up form’ and configure the form settings by entering:
- Form name: this information will be visible only to you.
- Description: This is optional and will only be visible to you.
- Default language: by default, it will be the language of your account, but you can change it from the dropdown menu.
- Shape appearance: In this case, select “popup”.
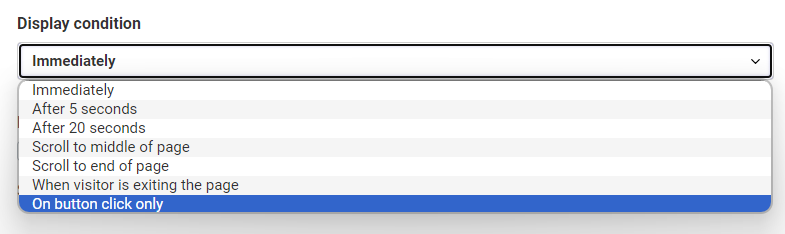
To decide when and under what conditions to display the popup, select the dropdown menu under the heading ‘Display condition’ and choose when you want to display your popup form.
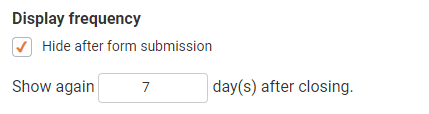
Then, set the display frequency to decide how often visitors will see the form after the first visit.
In this case, I chose not to show the popup more than once a week and checked the box ‘Hide after form submission’ to hide the form from those who have already subscribed.
Now it’s time to customize your form! 🤩
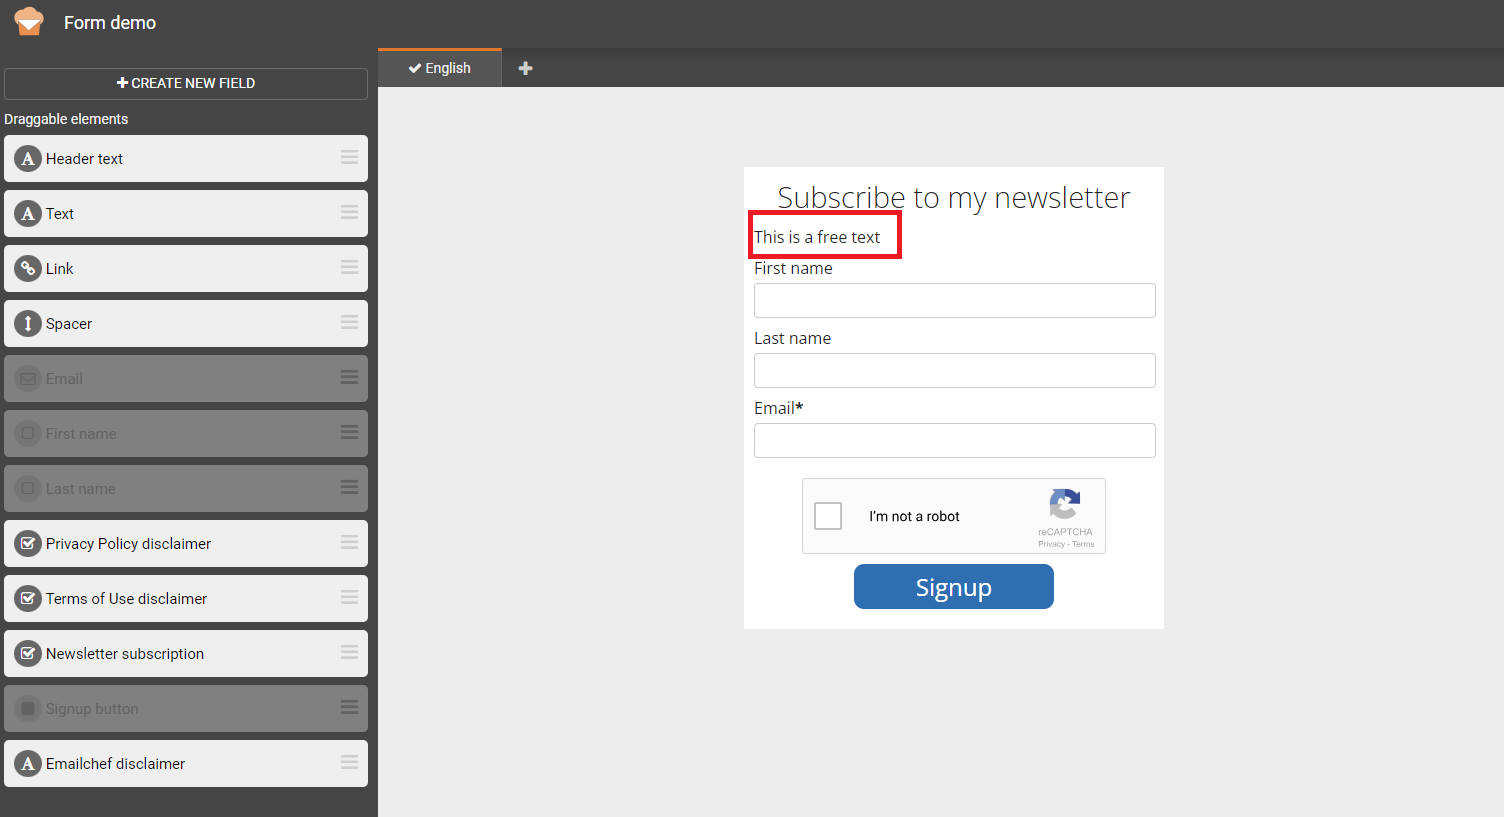
Choose one of the pre-made templates from our gallery and personalize it to your liking. To open the form editor, click on ‘Edit Form’ and you’ll have access to a simple and intuitive drag-and-drop system that allows you to add, remove, or modify form elements.
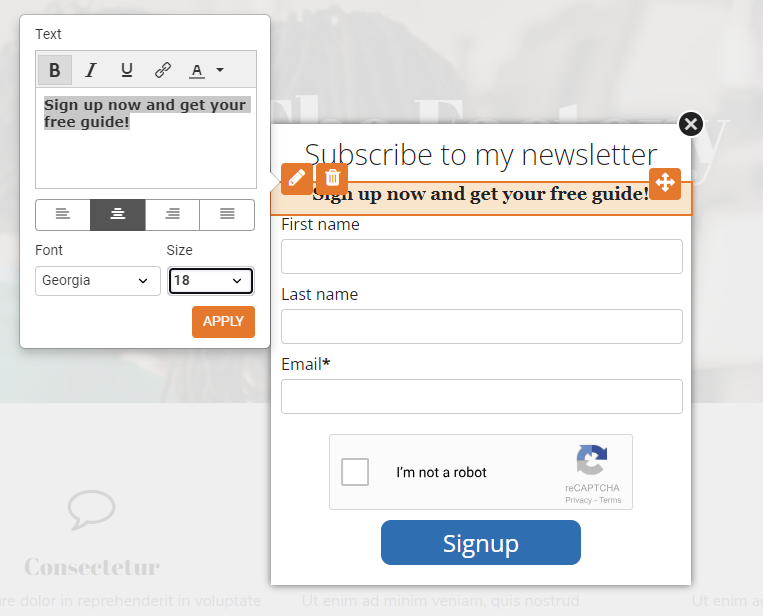
In this case, for example, I’ve added a new text block.
Then, I modified the text, alignment, font, style, and font size.
The same changes can be applied to all fields found in the left sidebar menu, although the customization tools vary depending on the selected element.
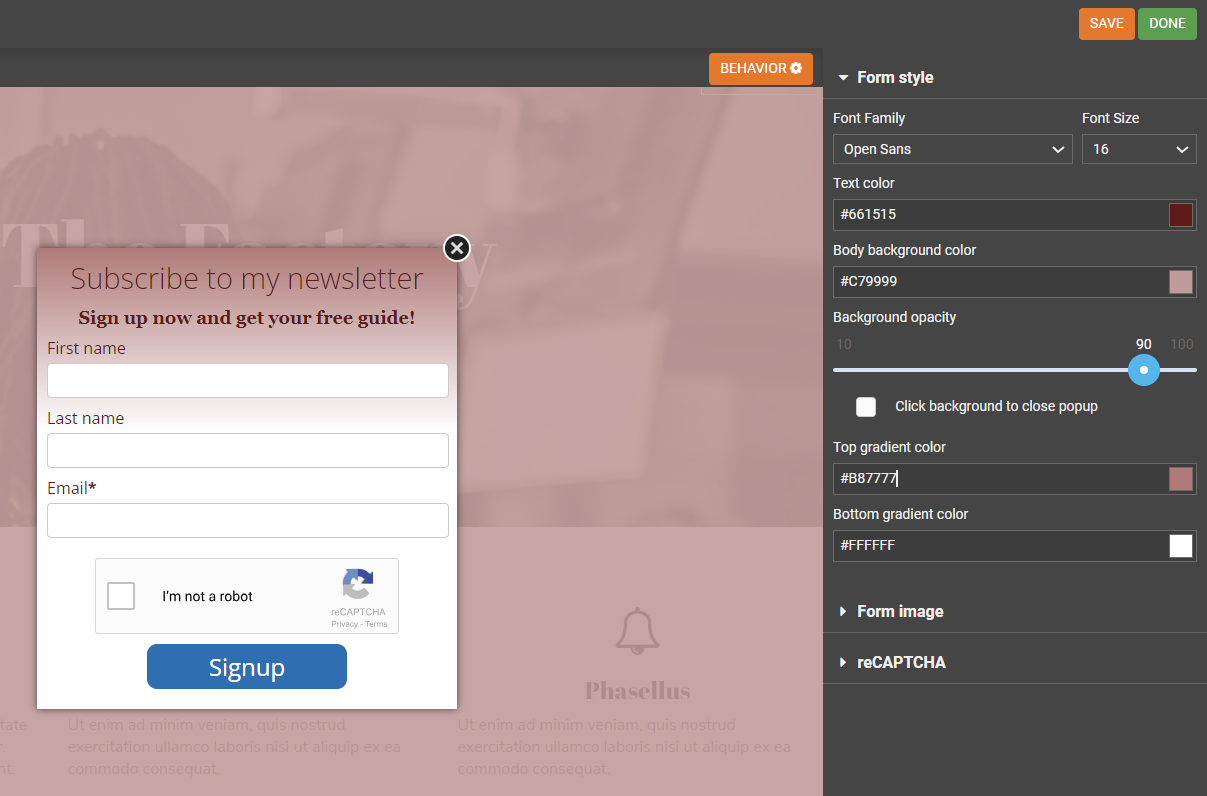
To modify the style of your form, you can use the tools located on the right side. In this case, I changed the text color, background color, and set up some gradients.
If you want to change the order of the fields, click on
and drag the element along the page to drop it where you prefer.
All previously created custom fields for your list will be displayed among the default elements. For example, if you have created a field for the date of birth, you can drag the field into the subscription form. All data will then be automatically synchronized in the selected list.
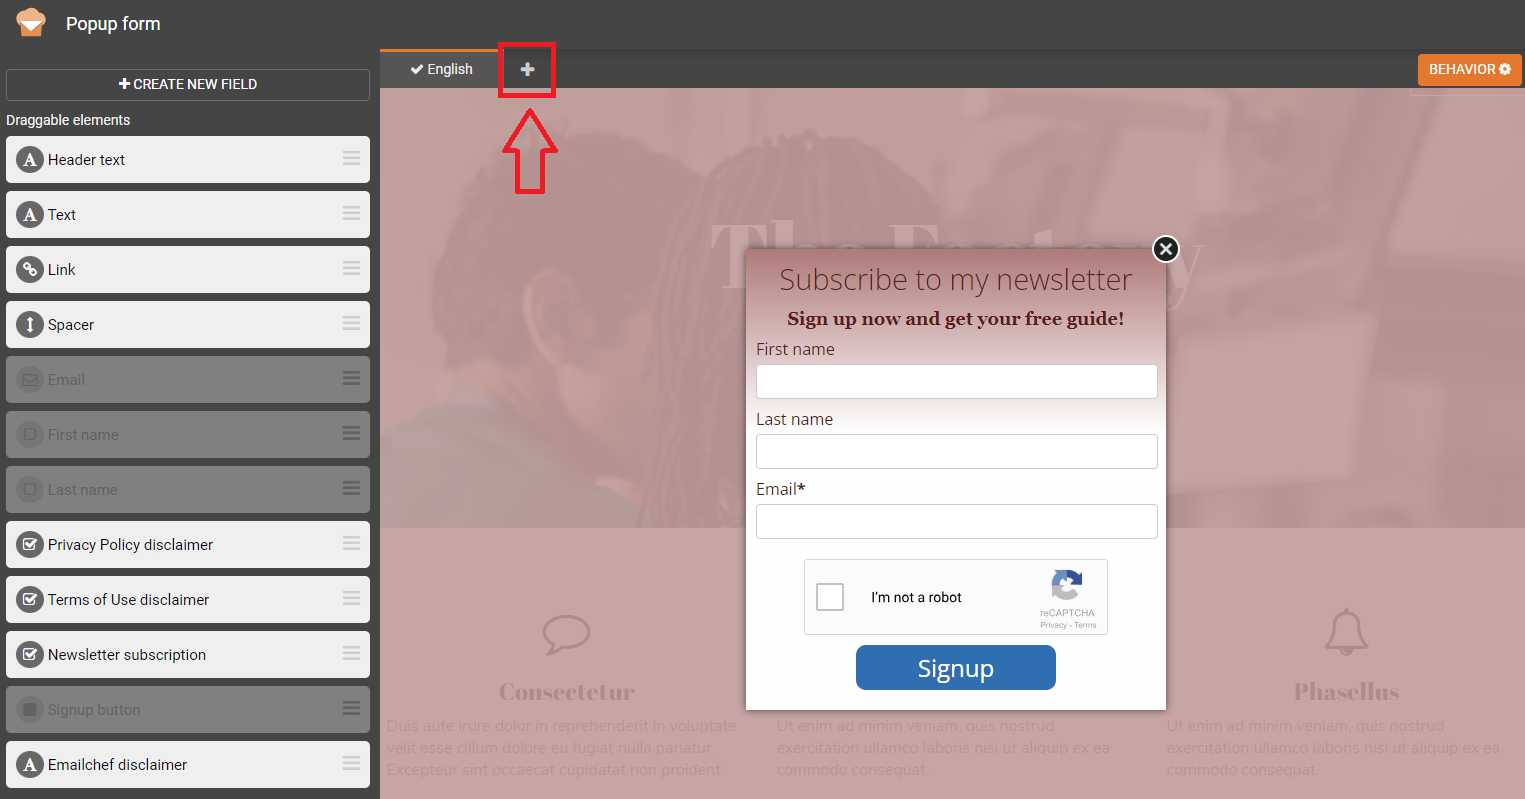
Emailchef also allows you to create translated versions of your form, which can be useful for multilingual websites. To do this, simply click on the ‘+’ symbol next to the first language, choose the language you’re interested in from the dropdown menu, and click on ‘Add’.
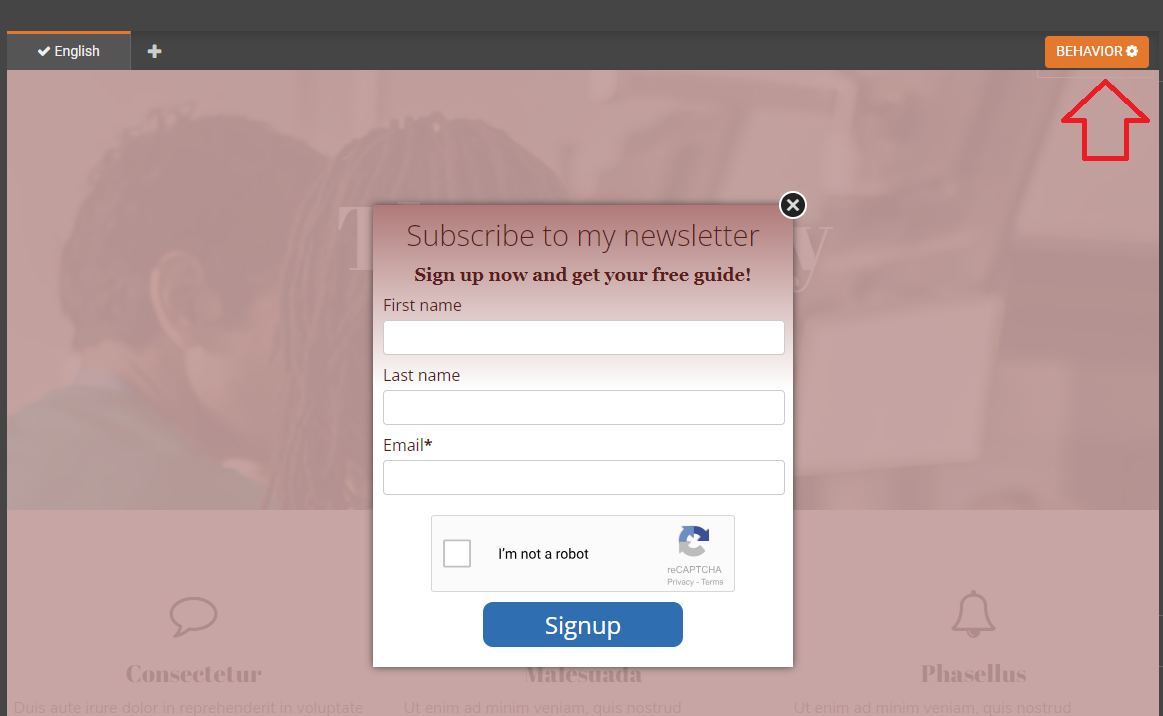
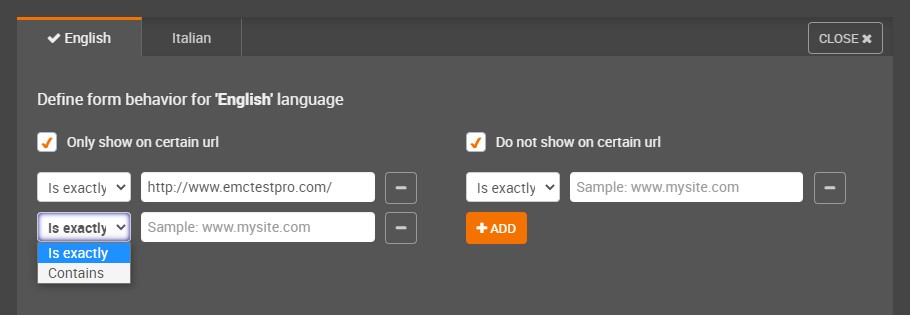
How to modify the behavior of you popup form.
Click on the ‘Behavior’ tab and decide on which URLs to show or not show your popup module. These settings apply to both the registration form and the success message displayed after filling out the form.
To select the URLs where to display the form, use the parameters Contains and Is Exactly.
Contains requires that the URL contains any part of the entered value. For example, if you enter “Contains: emailchef.com”, the popup module will appear on emailchef.com/knowledge-base/, emailchef.com/features/, etc.
The Is Exactly option allows you to choose a specific URL on which to display the form. For example, if you select “Is exactly: https://emailchef.com/knowledge-base/grow-list-create-signup-form/”, the popup will only appear on this URL.
Once you’ve finished editing your form, click on the ‘Done’ button at the top right.
You will return to the ‘Customize Form’ page. At this point, click on ‘Next’.
Within the Subscription Preferences page, you can set up confirmation emails, warning messages, welcome messages, and if you wish, you can send an automatic thank-you email.
Emailchef’s subscription forms are by default double opt-in forms (although it is possible to set up single opt-in forms under specific conditions). Thanks to the double opt-in option, Emailchef will send an email immediately after registration: this message contains a link (identified by the tag [[confirm_link]]) that the subscriber must click to confirm their registration and the validity of their email address.
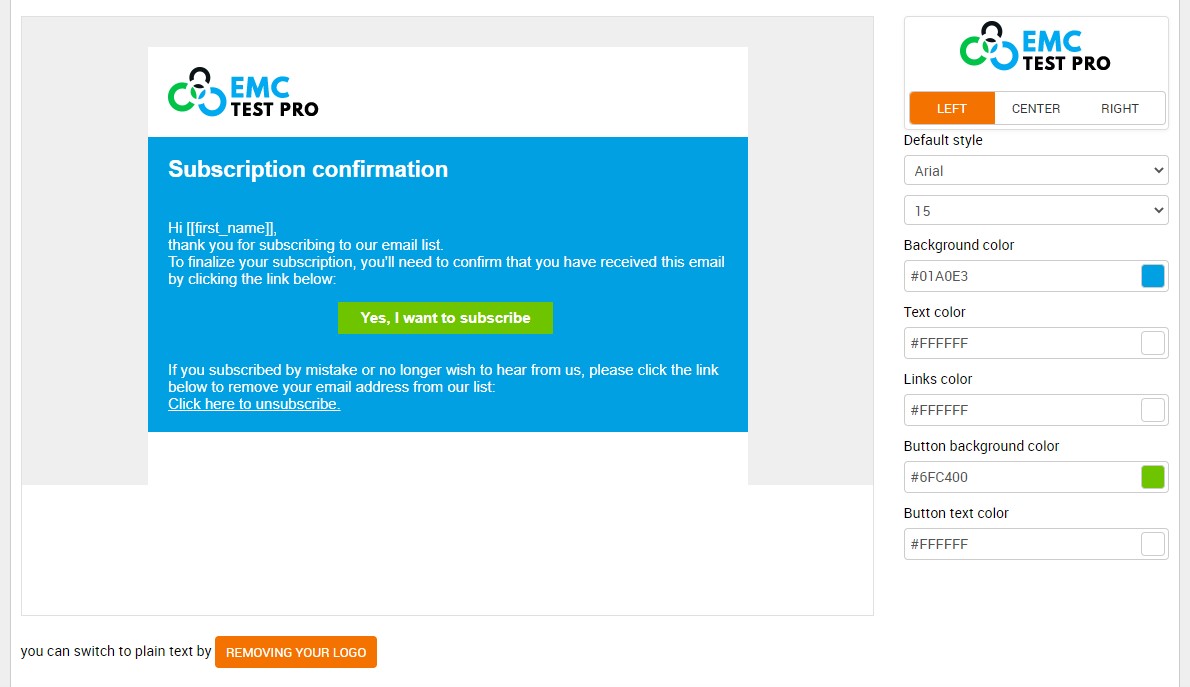
Emailchef provides you with default text for this confirmation email, which you can modify and personalize with your company’s logo.
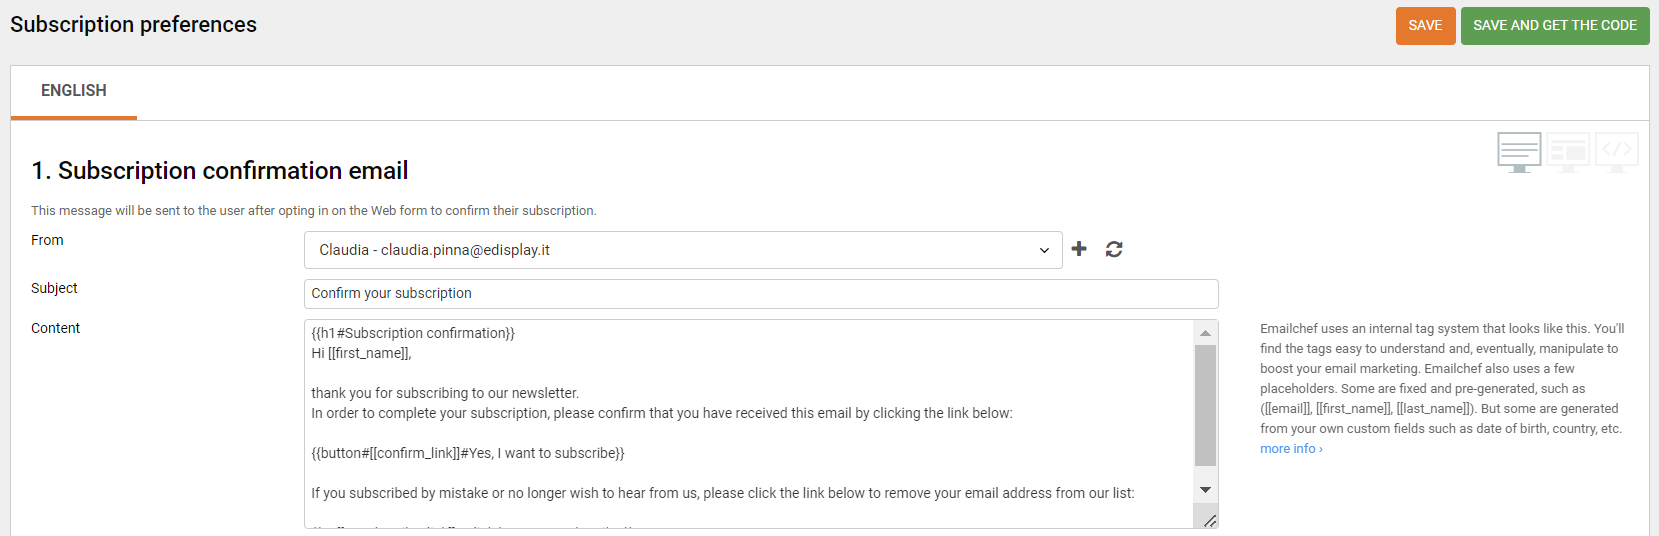
To send your subscribers a correctly formatted subscription confirmation email, Emailchef uses an internal and customizable tag system.
- {{h1#Subscription confirmation}} for the Title which appears in the body of the email.
- {{button#[[confirm_link]]#Yes, I want to subscribe}} for the confirmation button.
- {{a#[[unsubscribe_link]]#Click here to unsubscribe}} to add an unsubscribe link.
You can customize the italicized words after the hashtag #.
Emailchef also provides placeholders that are automatically replaced with subscriber information. Some are fixed, such as [[email]], [[first_name]], and [[last_name]]. Others are generated from custom fields created by you, such as date of birth or hometown.
Next, you will need to create a warning message to be displayed on your site after each registration. This page notifies the user that an email has been sent to them with a link to click to complete the registration.
You can customize this message as you prefer, or choose to direct people to a specific external landing page by selecting ‘External URL’ and entering the URL of the page.
Once the user has clicked on the confirmation link in the email, a welcome message will appear and the double opt-in process will be completed. Again, you can customize the text as you prefer or redirect users to a customized landing page by clicking on ‘External URL’ and entering the URL of the page.
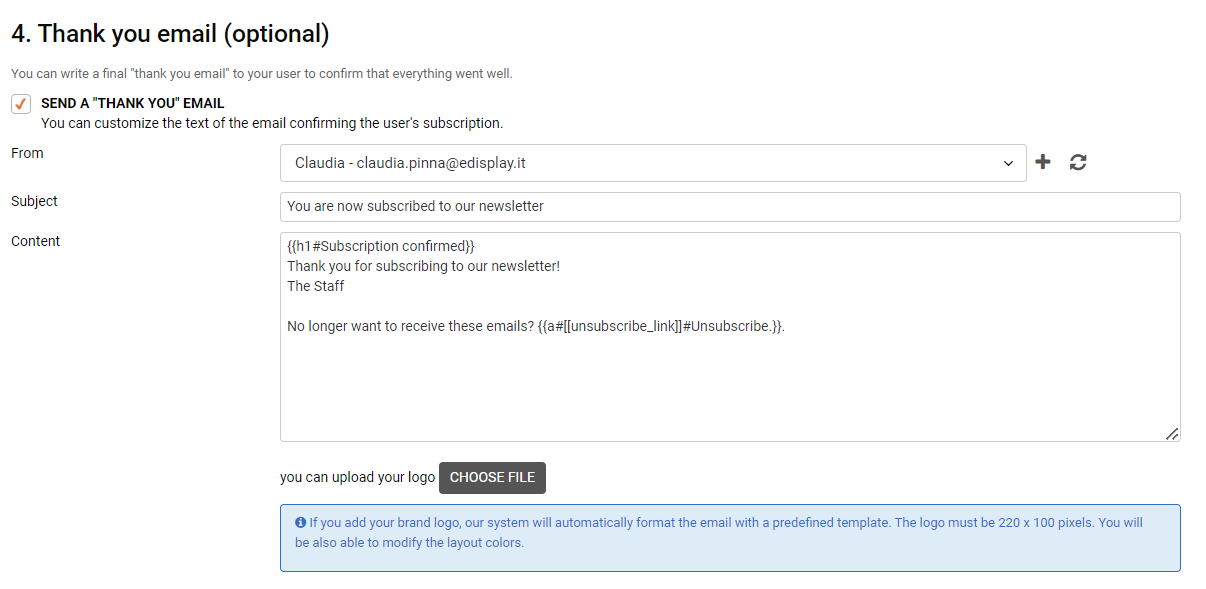
If you wish, you can also send a thank-you email to confirm that the process has been successful. Additionally, you can decide to upload your logo, and Emailchef will optimize it for you so that it automatically fits into your email.
Once you’ve finished, click on ‘Save and get the code’.
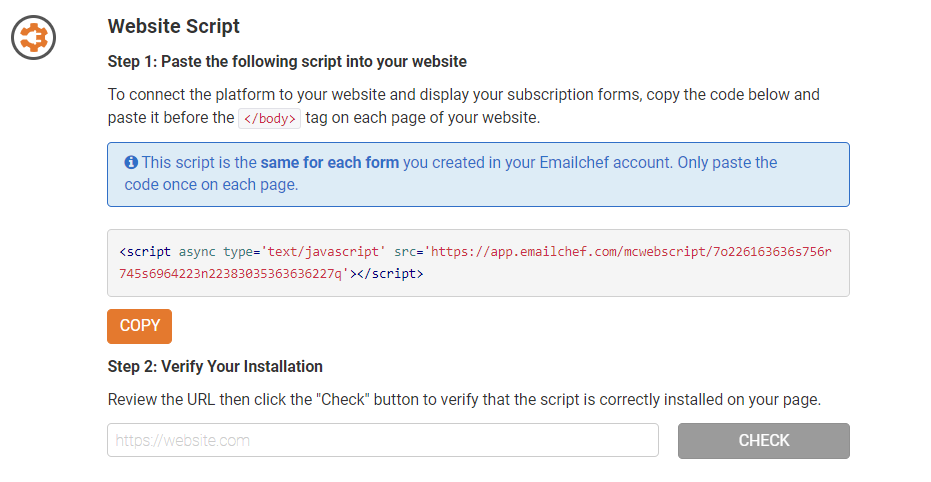
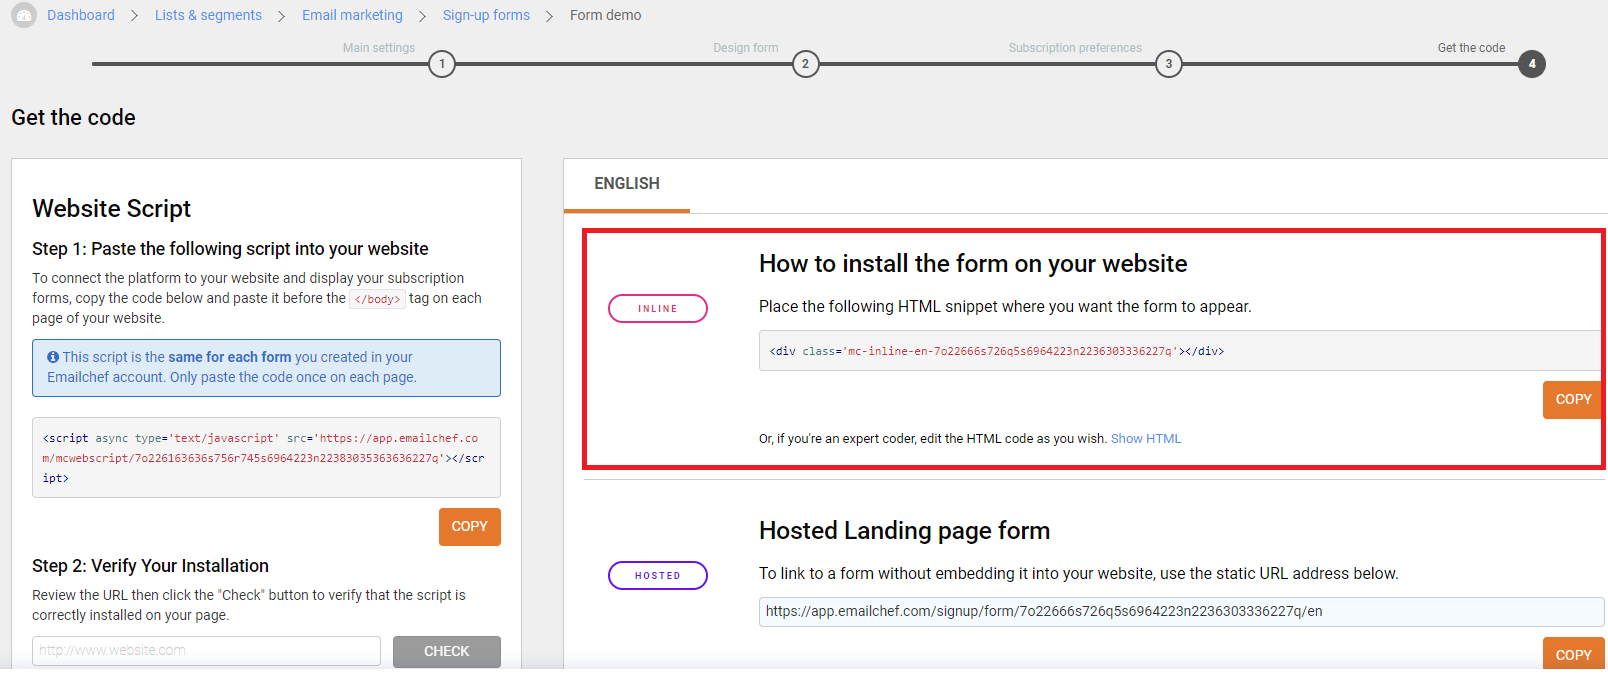
You won’t need to insert any extra code into your site to add a popup form. The only condition for the forms to be visible is the installation of the website script (in this final step, you’ll find the code again in case you haven’t installed it before).
Remember: it’s necessary to install the website script regardless of the type of form. The script will always be the same for every form on your Emailchef account, so you won’t need to add it more than once on the same page.
Our advice: if you paste the website script in the footer, the popup form will appear on every page of your site. This way, it will be easier for you to manage the display of forms and decide on which URLs to place them.
2. Inline Form.
Inline forms are modules that are embedded within your website.
After installing the website script on your site, click on ‘Lists and Segments’ in the left sidebar menu. Select the list you want to associate with the form and click on ‘sign-up forms’.
Click on ‘Create a sign-up form’ and configure the form settings by entering:
- Form name: this information will be visible only to you.
- Description: This is optional and will only be visible to you.
- Default language: by default, it will be the language of your account, but you can change it from the dropdown menu.
- Shape appearance: In this case, select “inline”.
Now it’s time to customize your form! 🤩
Choose one of the pre-made templates from our gallery and personalize it to your liking. To open the form editor, click on ‘Edit Form’ and you’ll have access to a simple and intuitive drag-and-drop system that allows you to add, remove, or modify form elements.
In this case, for example, I’ve added a new text block.
Then, I modified the text, alignment, font, style, and font size.
The same changes can be applied to all fields found in the left sidebar menu, although the customization tools vary depending on the selected element.
To modify the style of your form, you can use the tools located on the right side. In this case, I changed the text color, background color, and set up some gradients.
If you want to change the order of the fields, click on
and drag the element along the page to drop it where you prefer.
All previously created custom fields for your list will be displayed among the default elements. For example, if you have created a field for the date of birth, you can drag the field into the subscription form. All data will then be automatically synchronized in the selected list.
Emailchef also allows you to create translated versions of your form, which can be useful for multilingual websites. To do this, simply click on the ‘+’ symbol next to the first language, choose the language you’re interested in from the dropdown menu, and click on ‘Add’.
Once you have finished editing your form, click on the ‘Done’ button at the top right. You will return to the Customize Form page. At this point, click on ‘Next’.
Within the Subscription Preferences page, you can set up confirmation emails, warning messages, welcome messages, and if you wish, you can send an automatic thank-you email.
Emailchef’s subscription forms are by default double opt-in forms (although it is possible to set up single opt-in forms under specific conditions). Thanks to the double opt-in option, Emailchef will send an email immediately after registration: this message contains a link (identified by the tag [[confirm_link]]) that the subscriber must click to confirm their registration and the validity of their email address.
Emailchef provides you with default text for this confirmation email, which you can modify and personalize with your company’s logo.
To send your subscribers a correctly formatted subscription confirmation email, Emailchef uses an internal and customizable tag system.
- {{h1#Subscription confirmation}} for the Title which appears in the body of the email.
- {{button#[[confirm_link]]#Yes, I want to subscribe}} for the confirmation button.
- {{a#[[unsubscribe_link]]#Click here to unsubscribe}} to add an unsubscribe link.
You can customize the italicized words after the hashtag #.
Emailchef also provides placeholders that are automatically replaced with subscriber information. Some are fixed, such as [[email]], [[first_name]], and [[last_name]]. Others are generated from custom fields created by you, such as date of birth or hometown.
Next, you will need to create a warning message to be displayed on your site after each registration. This page notifies the user that an email has been sent to them with a link to click to complete the registration.
You can customize this message as you prefer, or choose to direct people to a specific external landing page by selecting ‘External URL’ and entering the URL of the page.
Once the user has clicked on the confirmation link in the email, a welcome message will appear and the double opt-in process will be completed. Again, you can customize the text as you prefer or redirect users to a customized landing page by clicking on ‘External URL’ and entering the URL of the page.
If you wish, you can also send a thank-you email to confirm that the process has been successful. Additionally, you can decide to upload your logo, and Emailchef will optimize it for you so that it automatically fits into your email.
Once you’ve finished, click on ‘Save and get the code’.
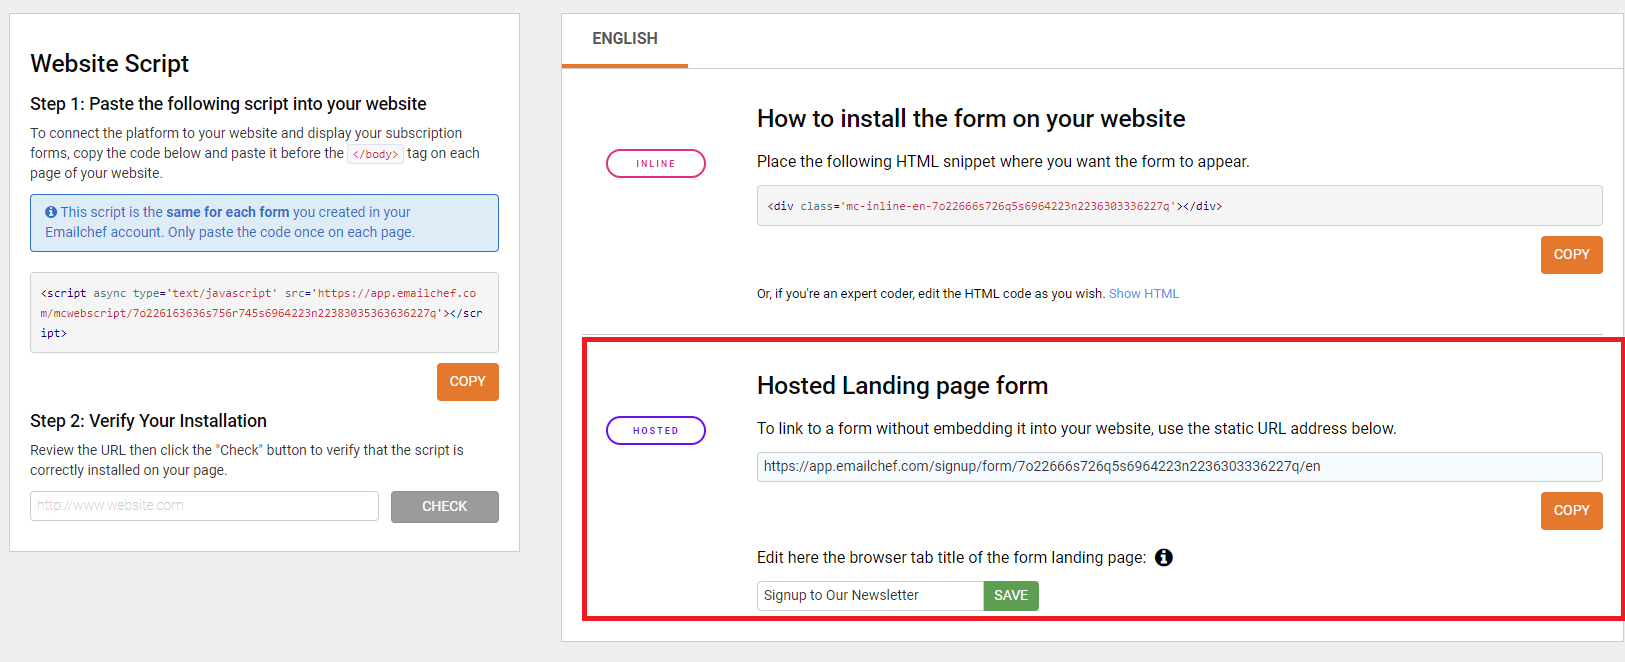
Finally, copy the HTML code of your Inline form and paste it onto your website, within the pages where you want it to appear.
If you have created the form in multiple languages, copy the code for each language.
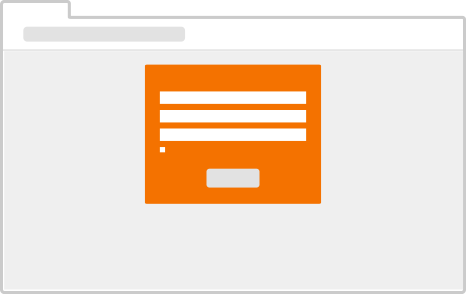
3. Form on an external landing page.
This form is hosted on a web page external to your website.
To create one, follow the guide for creating Inline forms. In the last step of form creation (Get the code), copy the code under the section “Hosted Landing page form” and paste it wherever you prefer (perhaps on your website, on a link, or in a button).