In the third step of creating your campaign, you can select the lists or segments to which you want to send your email. You now also have the option to exclude specific recipients using a dedicated feature.

Sending to recipients.
In the “Send to these lists and segments” table, select the lists and segments you want to include in your campaign.
As you can see, it’s possible to create a new segment directly during the campaign creation process.
Simply click on the “Create segment” option to quickly generate a segment that meets your requirements.
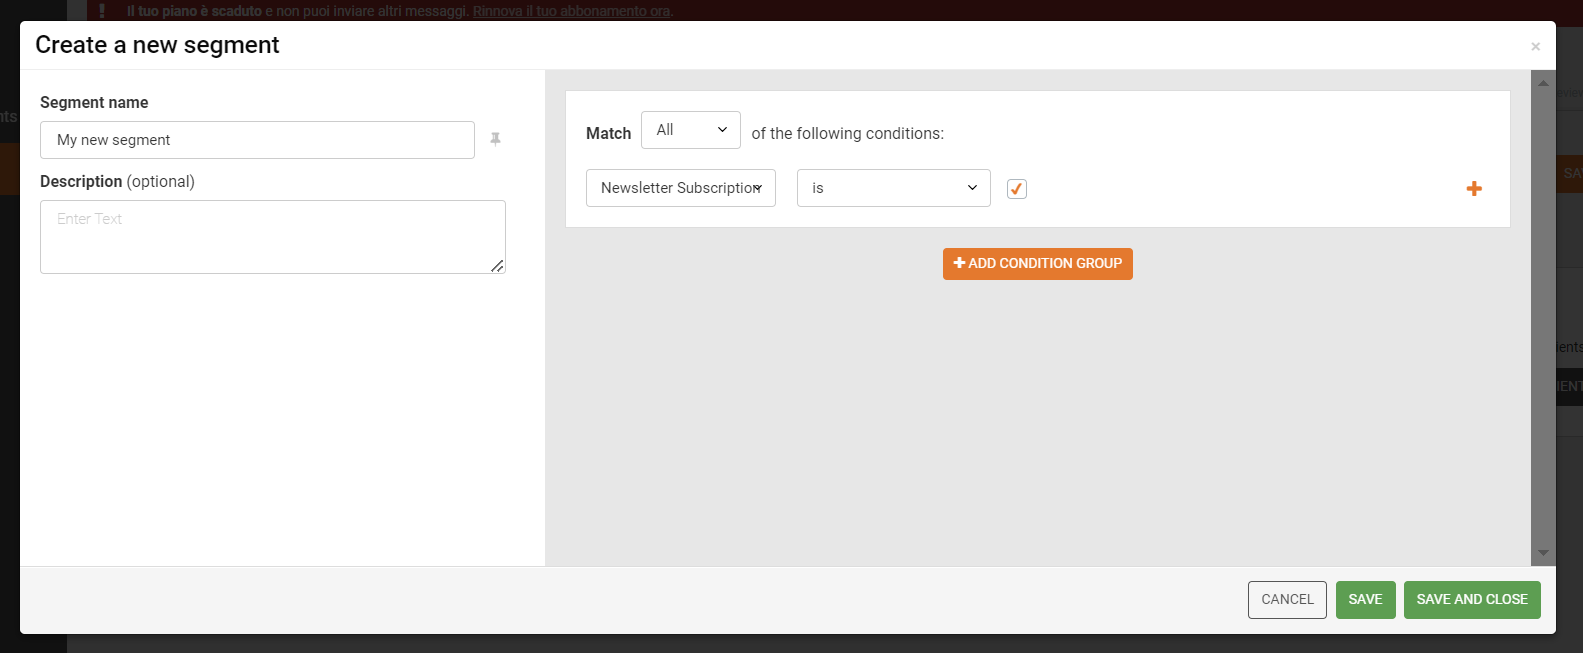
Once you have created your segment, click on “Save and close“. The newly created segment will be automatically selected, and the label NEW will be displayed to highlight it.
If you wish to make changes to your segment, click on the pencil icon located on the right side of the segment row. You will be able to edit the requirements for entry into the segment.

Once you have selected the list or segment of your interest, the number of recipients to whom the email will be sent will be displayed on the right side.
By clicking on “View recipients“, you can then see the list of your recipients.
If a contact is present in multiple recipient lists, they are considered only once. Contacts listed in the blacklist are excluded from the sending process.
Excluding recipients
Next to the “Send to these lists and segments” table, you’ll find a new table to exclude specific contacts from your campaign. This option is disabled by default, but you can activate it to exclude particular lists or segments.
If a contact is included in both the “Send to” and “Exclusion” tables, they will be automatically excluded from the campaign.
This feature gives you greater precision in targeting, ensuring your message reaches only the desired audience.
Once everything is set, click “Next” to proceed.