Once you have created the template for your email, you will need to complete the final details of your campaign.
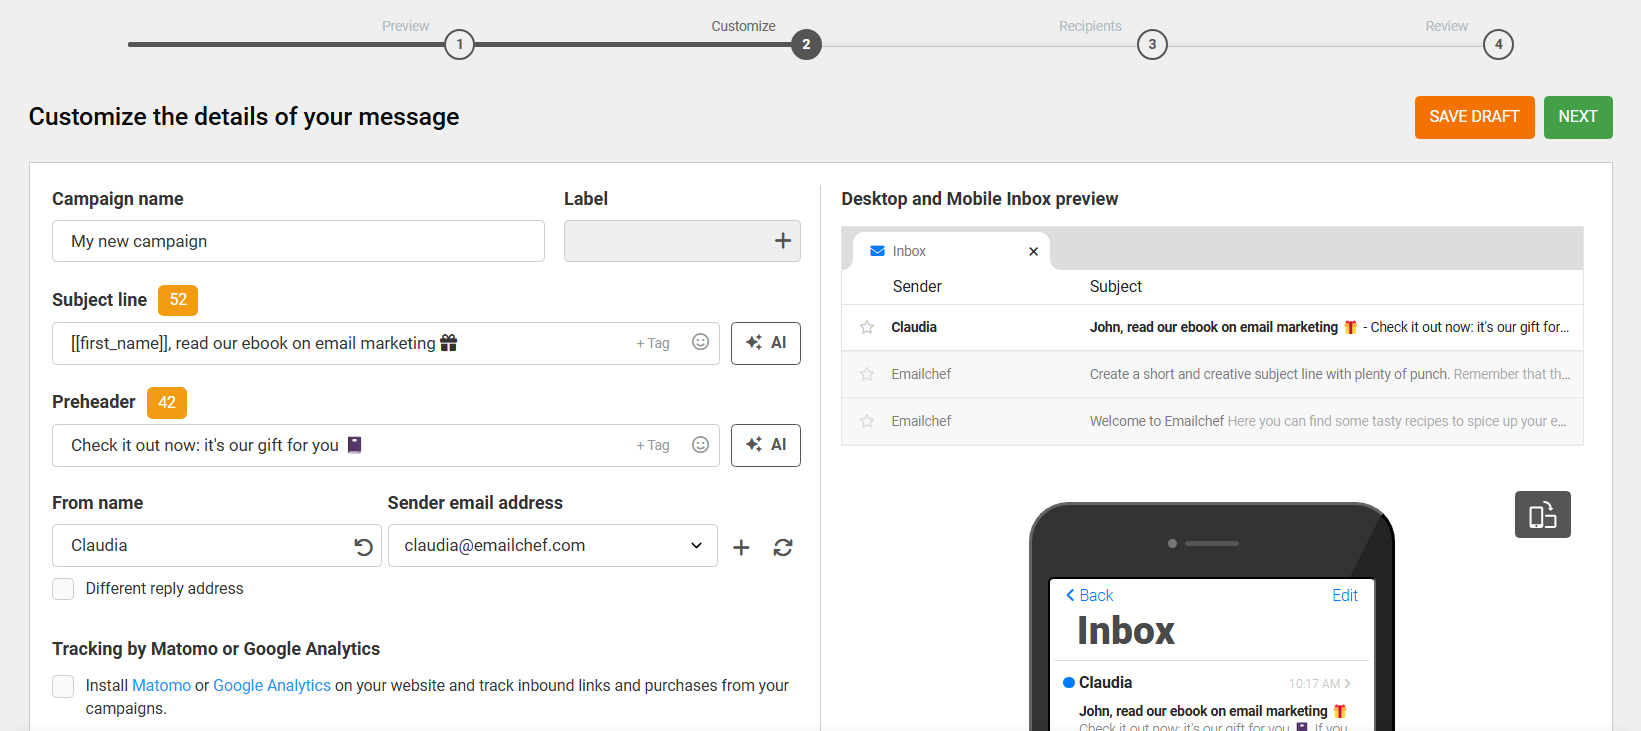
First, give your campaign a name. This is a brief description that you can use to identify your campaign. This information will only be visible to you and will not appear in the message.

Select or create a label to organize your campaigns quickly and easily, making it easier to search through filters.
Next, choose the sender address from which you wish to send your campaign. If you have multiple verified email addresses, you can select the one you want to use. You can also add a new sender by clicking the “+” button.
On the left, you can see the sender name associated with the selected email address. If you want, you can edit the name directly in the field.

If you prefer, you can choose an alternative reply address. This allows you to add an email address (different from the sender’s) to which replies to your message will be sent.
To do this, check the option ‘Different reply address’ and select the address that will receive the reply emails.

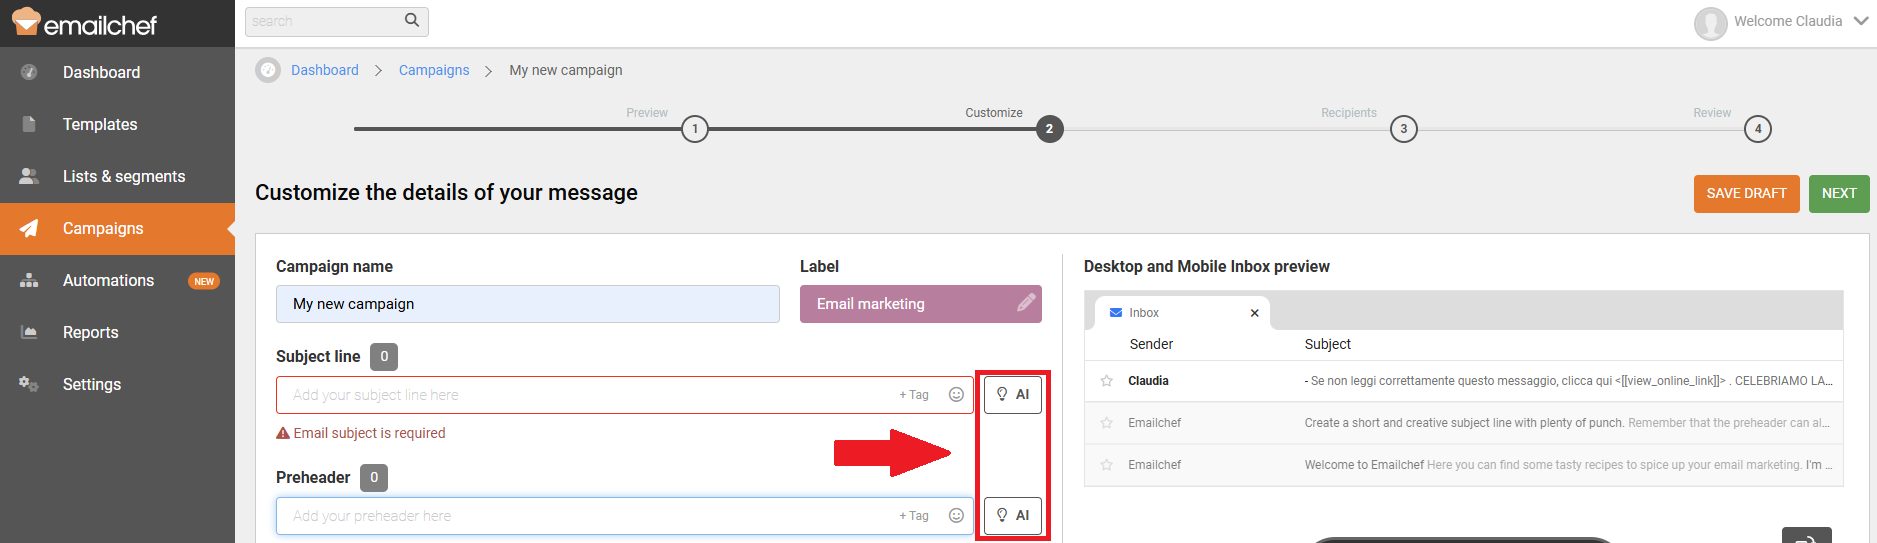
At this point, you’ll need to write the subject line of your email.
Write one that is interesting and impactful, capturing the attention of your recipients. However, we recommend not exceeding 60 characters: beyond this limit, your subject line risks being cut off.

You can also add a ‘tag’ field to the subject line of your email (for example, the recipient’s name) to make it more effective and personalized. Click on ‘Add tag’ located to the right of the subject line and select the one you’re interested in. The tag will be automatically inserted, and you can place it wherever you want.
If you want to add emojis, simply click on the emoji symbol on the right and select the one you’re interested in.
Once you’ve finished the subject line, you’ll need to prepare a preheader for your email. In short, this is a sentence that complements your subject line.
The preheader is visible in some email clients (like Gmail) in the inbox list, immediately after the subject.
Again, we recommend not exceeding 60 characters for the preheader. As with the subject line, you can add tags and emojis here too.

Don't know what to write in the subject line and preheader?
Starting today, you can ask Emailchef’s artificial intelligence 🤖
Writing effective subject lines and preheaders is essential for every email marketing campaign.
These are two crucial elements that determine whether your messages will be opened or not.
But figuring out what to write to grab recipients’ attention and encourage them to open your messages isn’t always easy.
That’s why, starting today, you can use Emailchef’s artificial intelligence to automatically generate the subject and preheader for your emails.
How?
- Click on AI, located next to the subject and preheader boxes.
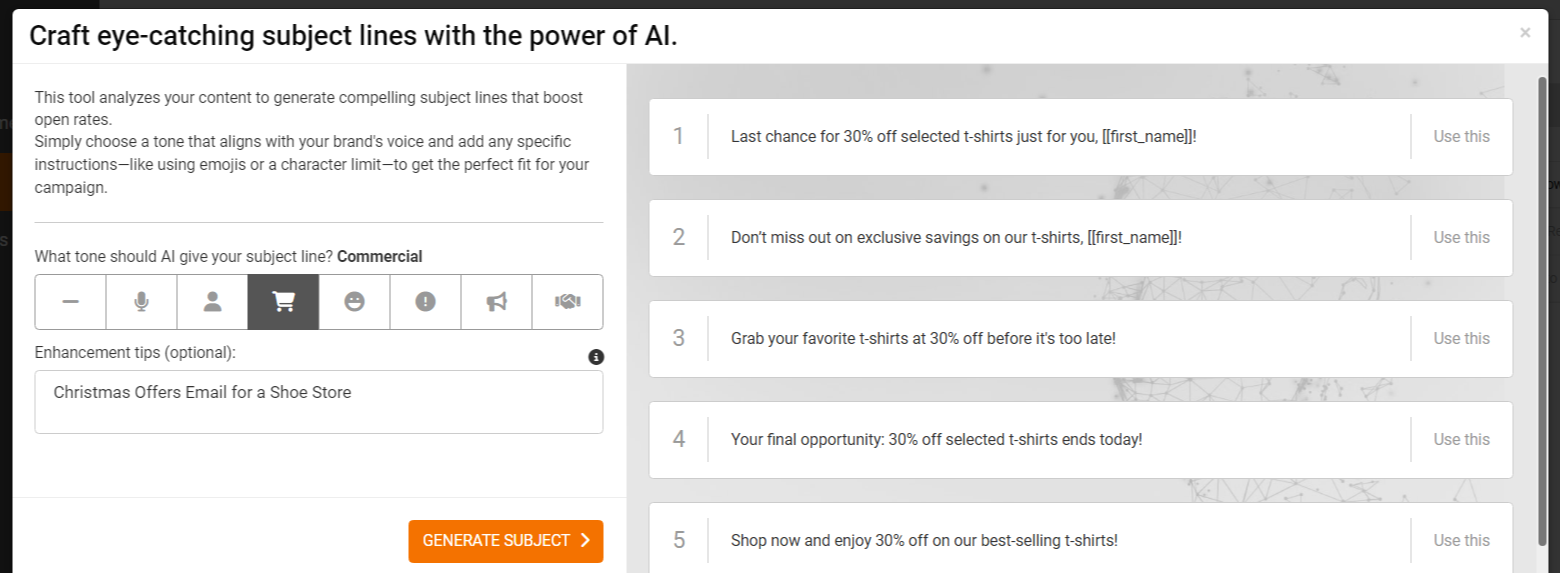
- The AI will analyze the email content to generate effective subject lines that increase your open rate.
- Choose a tone that aligns with your brand’s voice.
- If you wish, add specific instructions in the suggestions, such as using emojis or a character limit, for a result perfectly suited to your campaign.
- Click “Generate Subject” and select the one that best fits your needs.
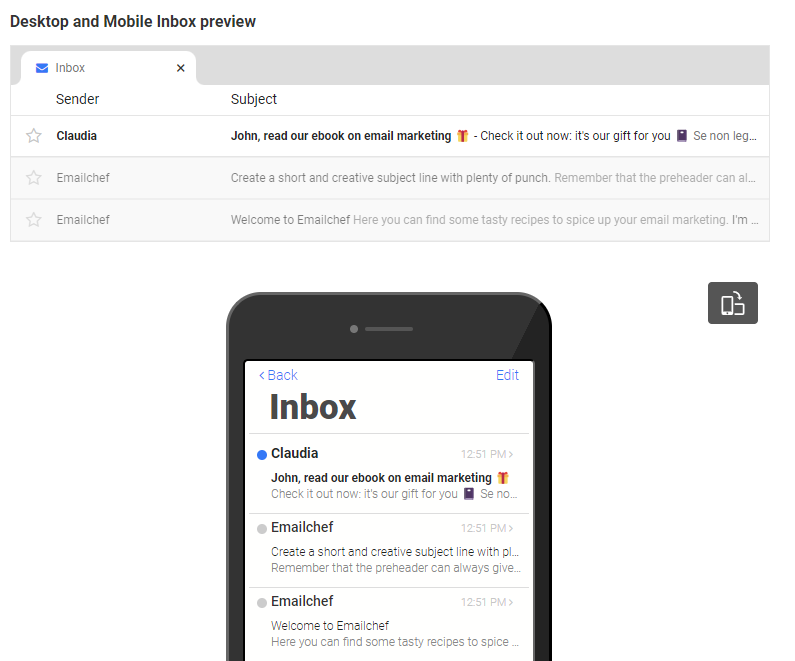
At any point during the compilation, you can preview how your email will appear on major desktop and mobile devices. If you’ve inserted tags, they will be replaced with a standard name to give you a more realistic idea of how the email will be displayed.
If you have Google Analytics installed on your website, you can check the box for ‘Tracking by Google Analytics.’ This way, you can track inbound links and purchases from your campaign.

Once you have finished and entered all the required information, click on ‘NEXT’.