To make your email marketing campaigns truly effective, it’s essential to send personalized messages and offers to your contacts. Tailored communications designed for your audience help increase open rates, click-through rates, and conversions.
Segmentation allows you to create groups of contacts who share specific characteristics or behaviors, so you can send them more targeted and relevant content.
With Emailchef segments, you can organize your list based on custom fields (such as date of birth, language, or country) or on advanced conditions based on user behavior, for example, subscription date, campaign opens, or clicks.
How to segment a list: a quick practical tutorial.
Segmentation doesn’t have to be complicated. With Emailchef, you can create segments in just a few clicks, using dozens of different conditions.
Here’s how:
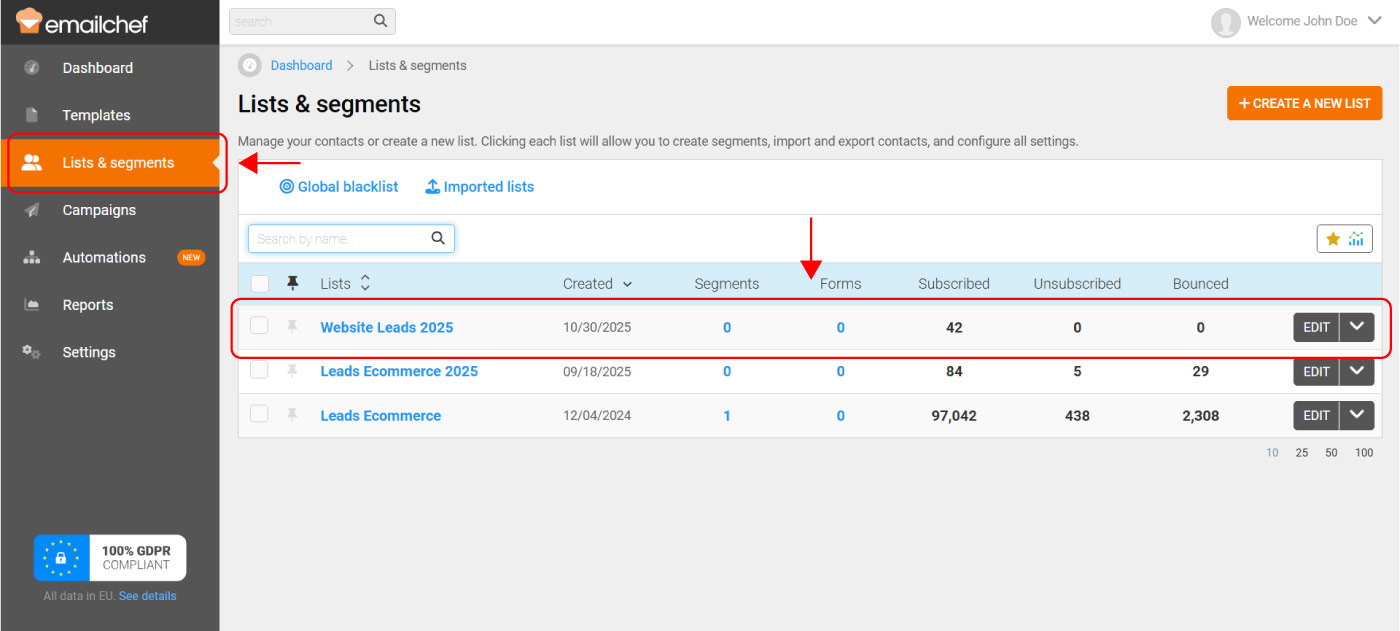
Go to Lists and Segments from the menu on the left.
Select the list you want to segment.
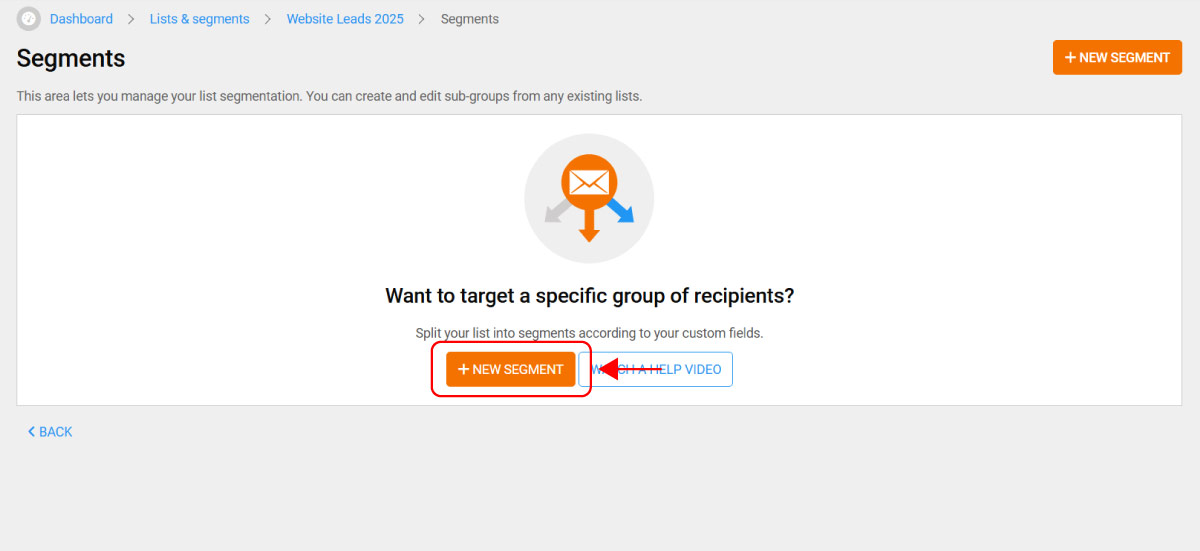
Click on Segments, then on New segment.
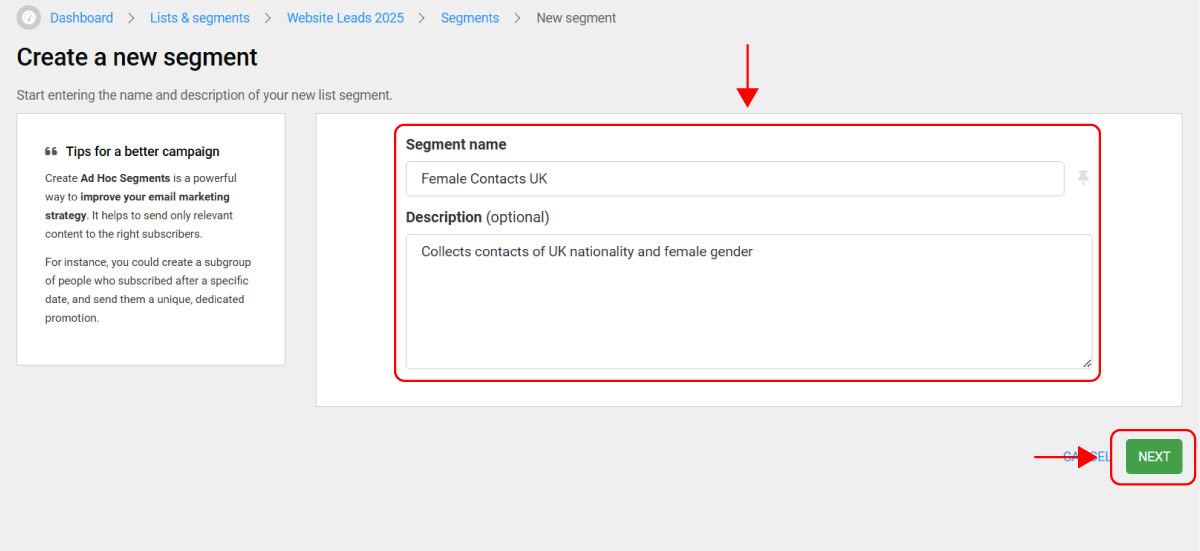
Give your segment a name and set the selection parameters.
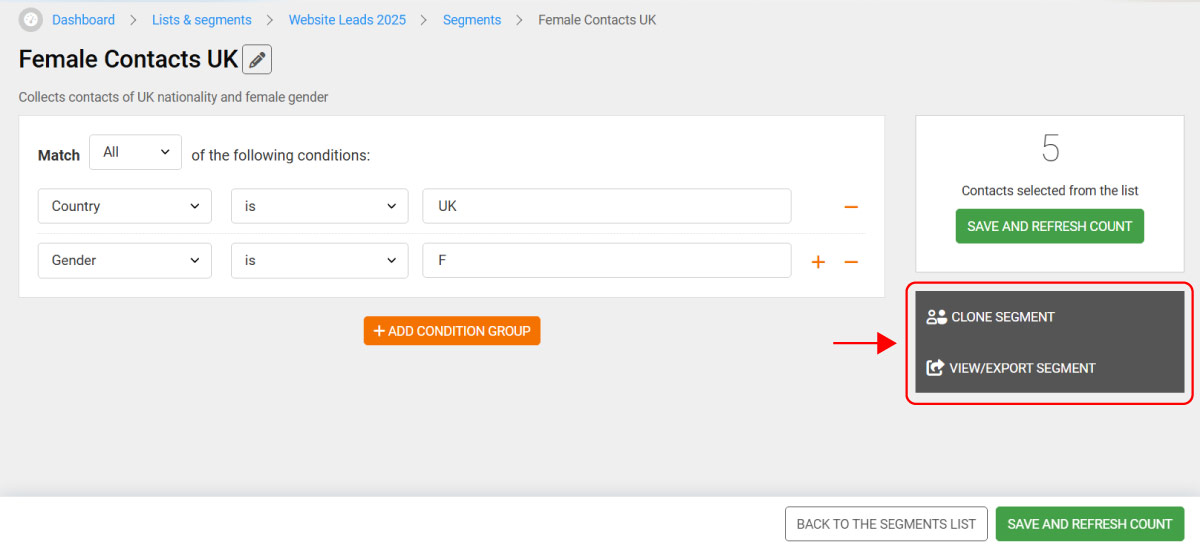
Here you can define the conditions that contacts in your list must meet to be included in the segment. You can choose from the following predefined conditions:
Email;
First name;
Last name;
Privacy policy;
Terms & conditions;
Newsletter subscription;
Contact rating;
Subscription date;
Subscription type;
Message sent;
Message delivered;
Message opened;
Message clicked;
Message not opened;
Message not clicked;
Last newsletter sent date;
Last newsletter open date;
Last newsletter click date.
Alternatively, you can use one of the custom fields you created for your list.
Along with these conditions, you can apply logical operators and variables such as “is,” “is not,” “is empty,” “starts with,” and more.
You can set up:
Segments that meet all or none of the selected conditions.
Segments with multiple conditions, combined using “and” or “or”.
Once you’ve defined the conditions, your segments will update automatically, so they’re always ready for your campaigns and automations — no manual editing required.
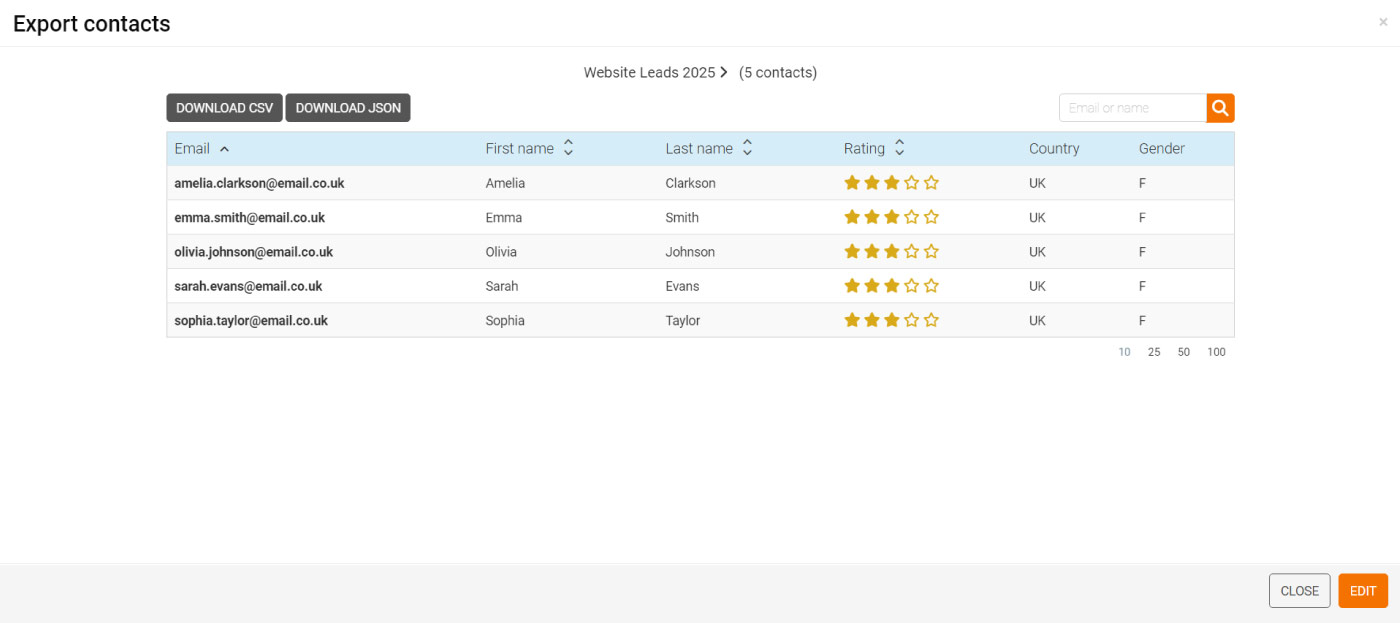
The resulting segment can also be viewed and exported in JSON or CSV format, or cloned and saved directly from the Segments page.