How to Create an Automated Welcome Email Flow in Emailchef.

The welcome flow is the best place to start if you’re new to email automation.

Every time someone joins your list, they automatically receive a welcome email: the moment when attention is at its peak and engagement is most likely. A few days later, once the contact has had a chance to get to know you, a second email arrives with an offer.

How to set up a welcome Flow:

Entry point: contact enters list.

The flow starts when a contact subscribes to your list. Select the correct list and click Save to confirm the step. Keeping the Repeat flow switch off ensures each contact goes through the automation only once.

Action: send email.

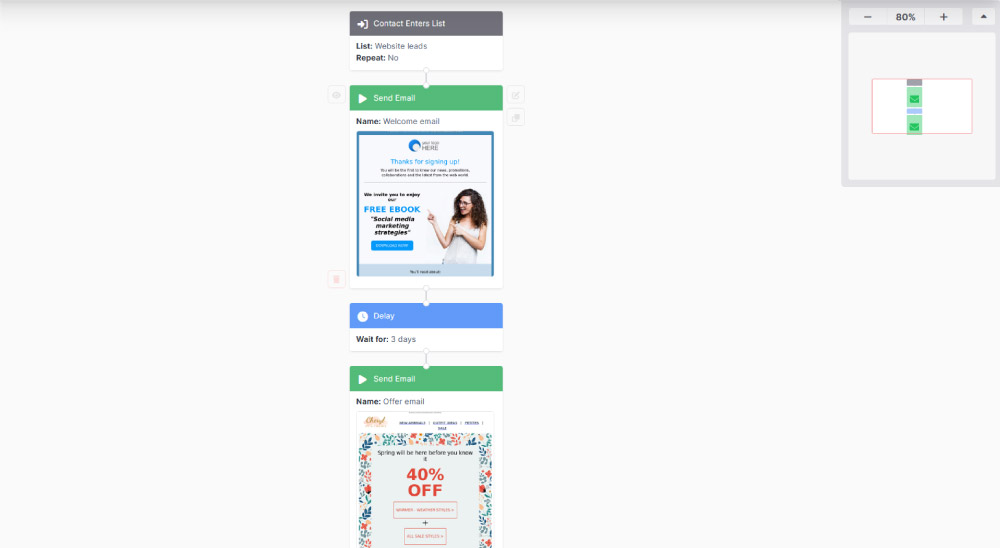
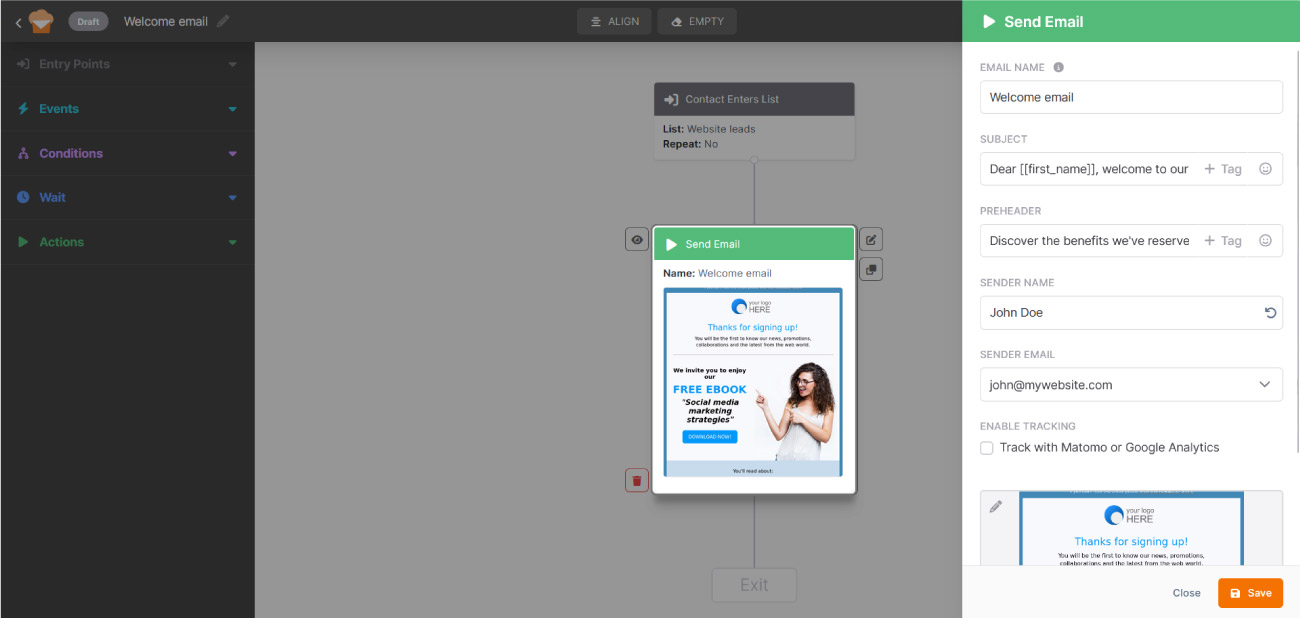
Select the welcome email your contact will receive immediately after subscribing. This is the right moment to introduce your brand and make a strong first impression.

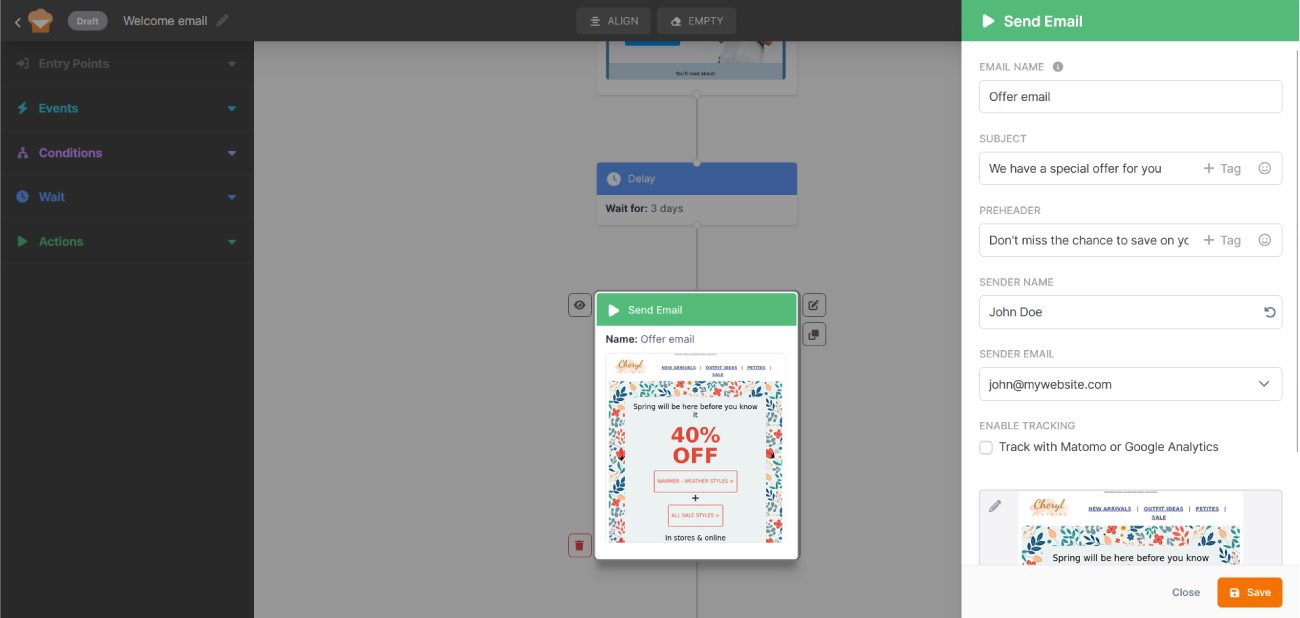
Give the email an internal name: this is just for your reference and won’t be visible to contacts. 

Then write the subject line and preheader, set the sender name (the name contacts will see in their inbox) and the email address you want to send from. Finally, select your welcome email template.

Wait: set a delay.

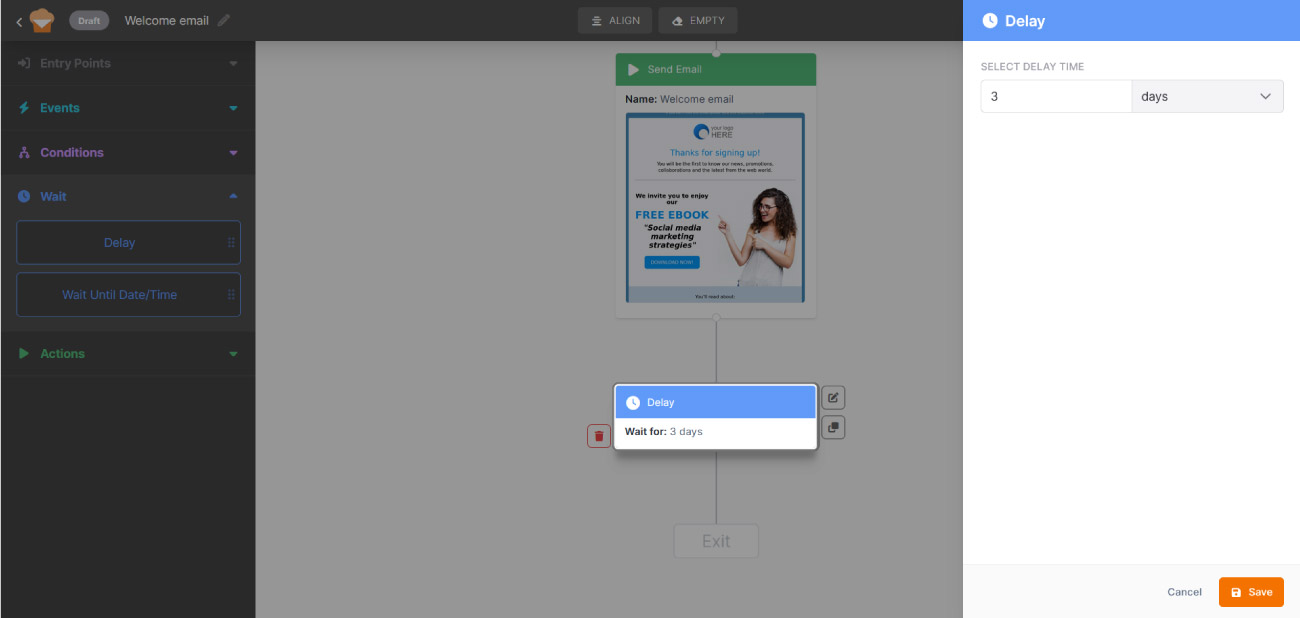
Adding this step puts the flow on pause. In this case, waiting three days strikes the right balance: long enough not to feel pushy, short enough to stay relevant.

Action: send email.

Fill in the required details to automatically send an offer after the 3-day wait. By this point, the contact has had time to get familiar with your brand and is more likely to respond.