In this article we’ll show you how to create, send, and analyze a traditional email campaign in just a few minutes. Emailchef comes with many more functions and capabilities but you can use this step-by-step procedure as an easy introduction to our system. Refer to the full user guide for all other information.
Ready? Let’s start!
1. Validate a sender
First, you need to register a sender for your emails. Log into Emailchef and click “SETTINGS” in the menu on the left. Click “VALIDATED SENDERS”, then “ADD A NEW SENDER”.
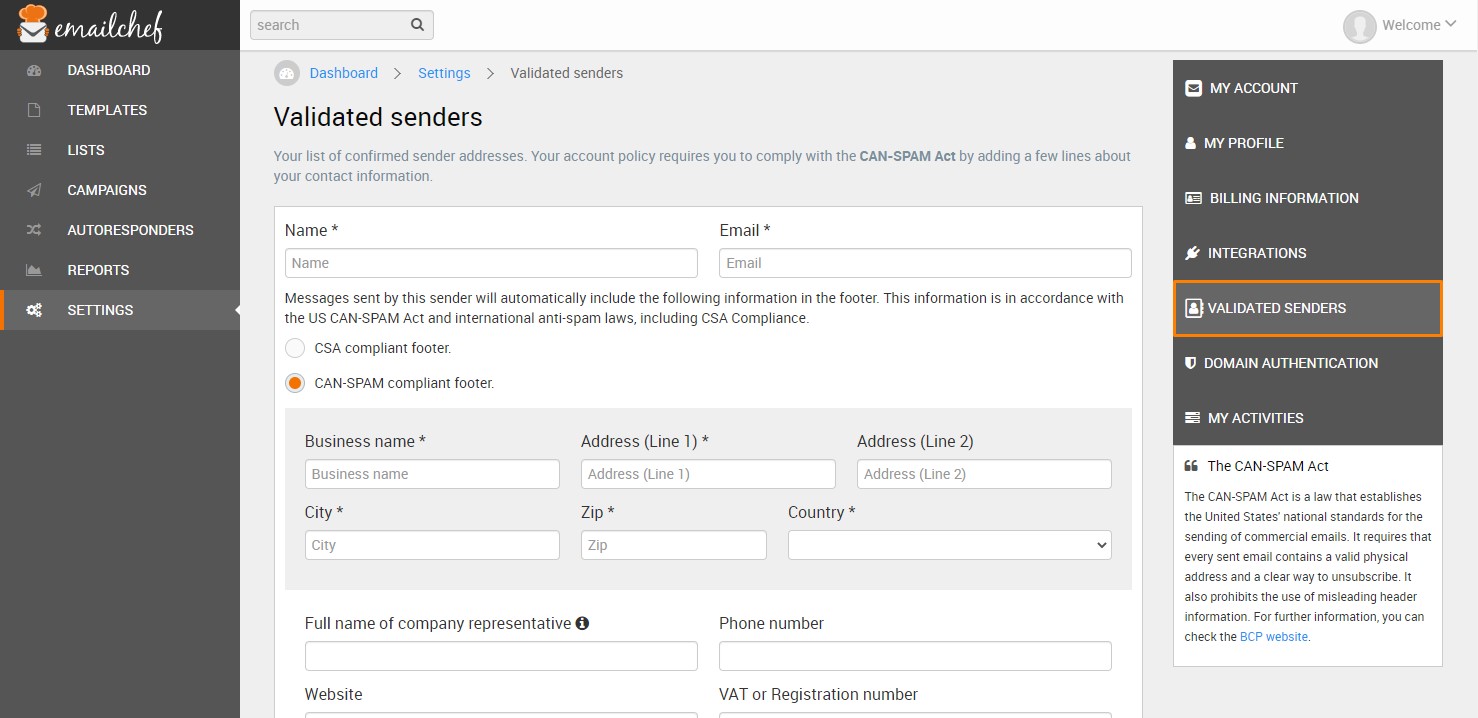
Complete the fields using the sender’s email address. Enter a valid postal address, then click “SAVE”.
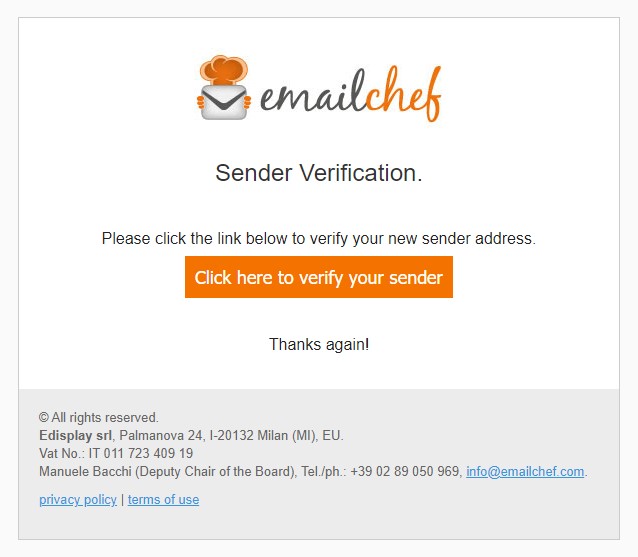
The sender will receive a verification email. Verify the sender’s email address by clicking the link in the email.
2. Add your contacts
Now create a list of contacts to receive your newsletter. Click “LISTS” on the left menu, and enter the list management page. Now click “Create a new list”:
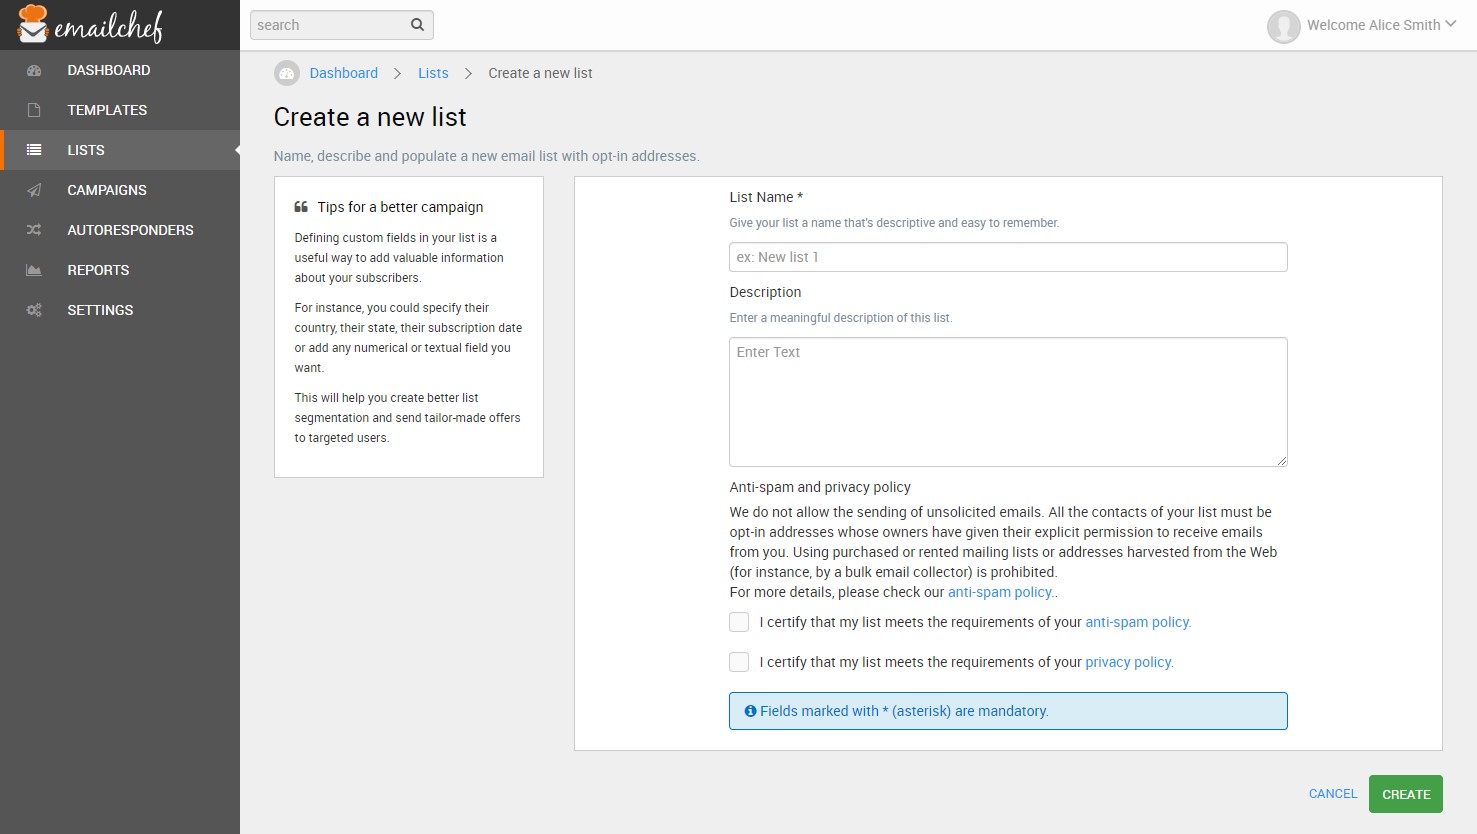
Give your list a name and a description, and check the two boxes below to certify that you’ll be sending emails only to permission-based addresses. You can only send emails to people who have clearly stated their willingness to receive them. Now click “CREATE”.
Once saved, you’ll be ready to start adding contacts. You can:
- Import the addresses from an external URL or from a file (Emailchef accepts the following formats: .xls, .xlsx, .ods, .csv, and comma separated values in .txt.) You can also import contacts from Google Contacts and Google Sheets.
- Add your contacts manually. You’ll need to complete the field marked “email” and you can add up to four other fields for your contacts.
- Copy and paste a list of addresses from the clipboard. Place each address on a single line.
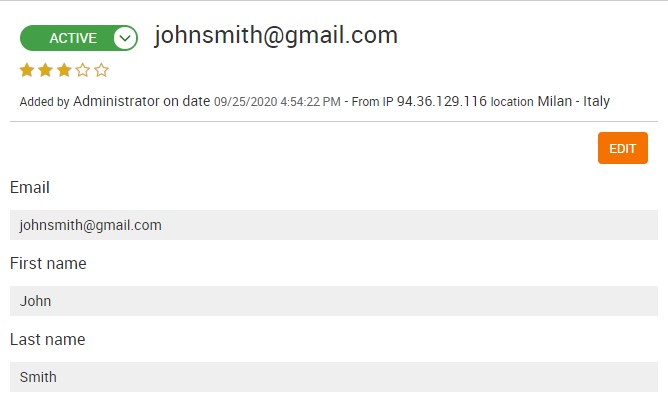
You can edit your contacts at any time. So you can add your contacts’ first and last names, for example:
To add other information fields to your contact list, click “Custom Fields.” Emailchef also provides a dedicated editor to create and embed a sign-up form on your website. It’s still the best way to grow your list and attract new subscribers. For more information about sign-up forms, refer to the full guide.
Okay, now you’re ready to compose your first email!
3. Create and send your email
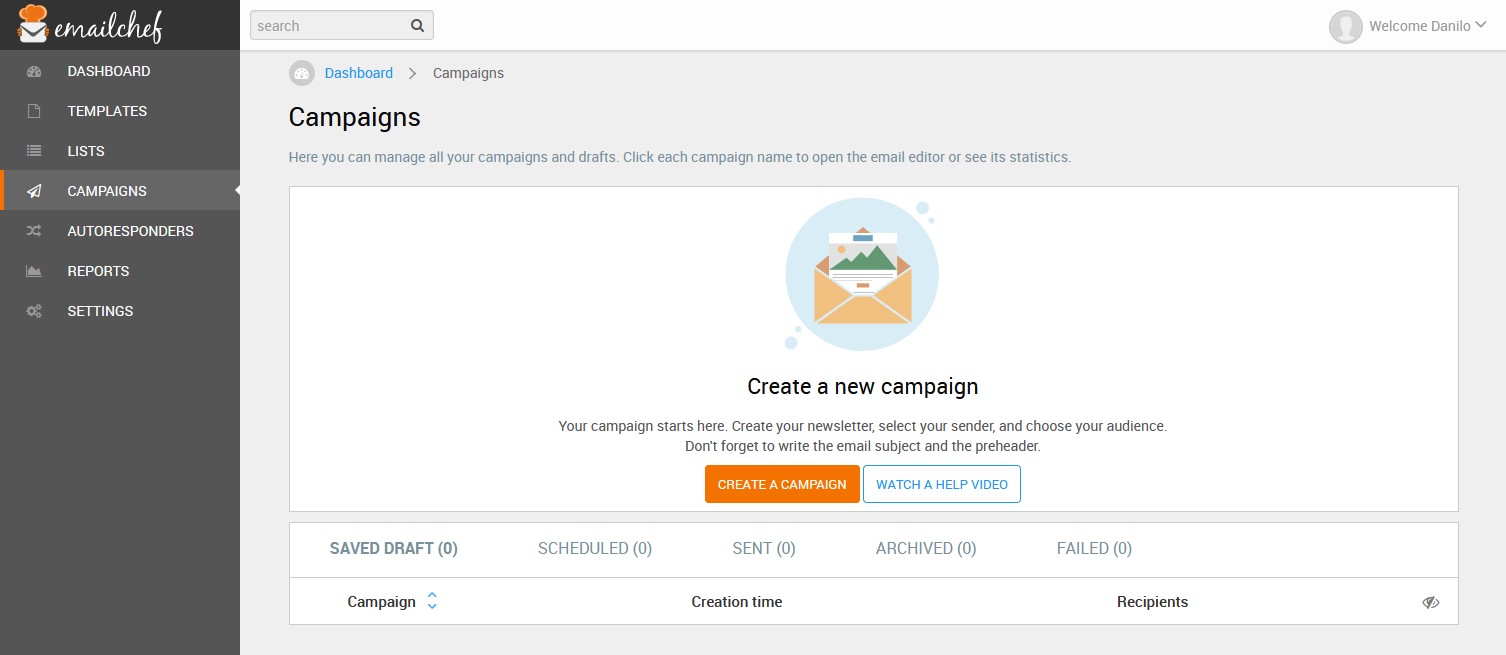
Click “CAMPAIGNS” in the menu on the left, then press the “Create a campaign” button:
Here you can:
- Create a professional template using our drag & drop editor.
- Choose a ready-made template from our archive.
- Load an existing template from an HTML file or from an external URL.
We recommend starting with one of our ready-made templates.
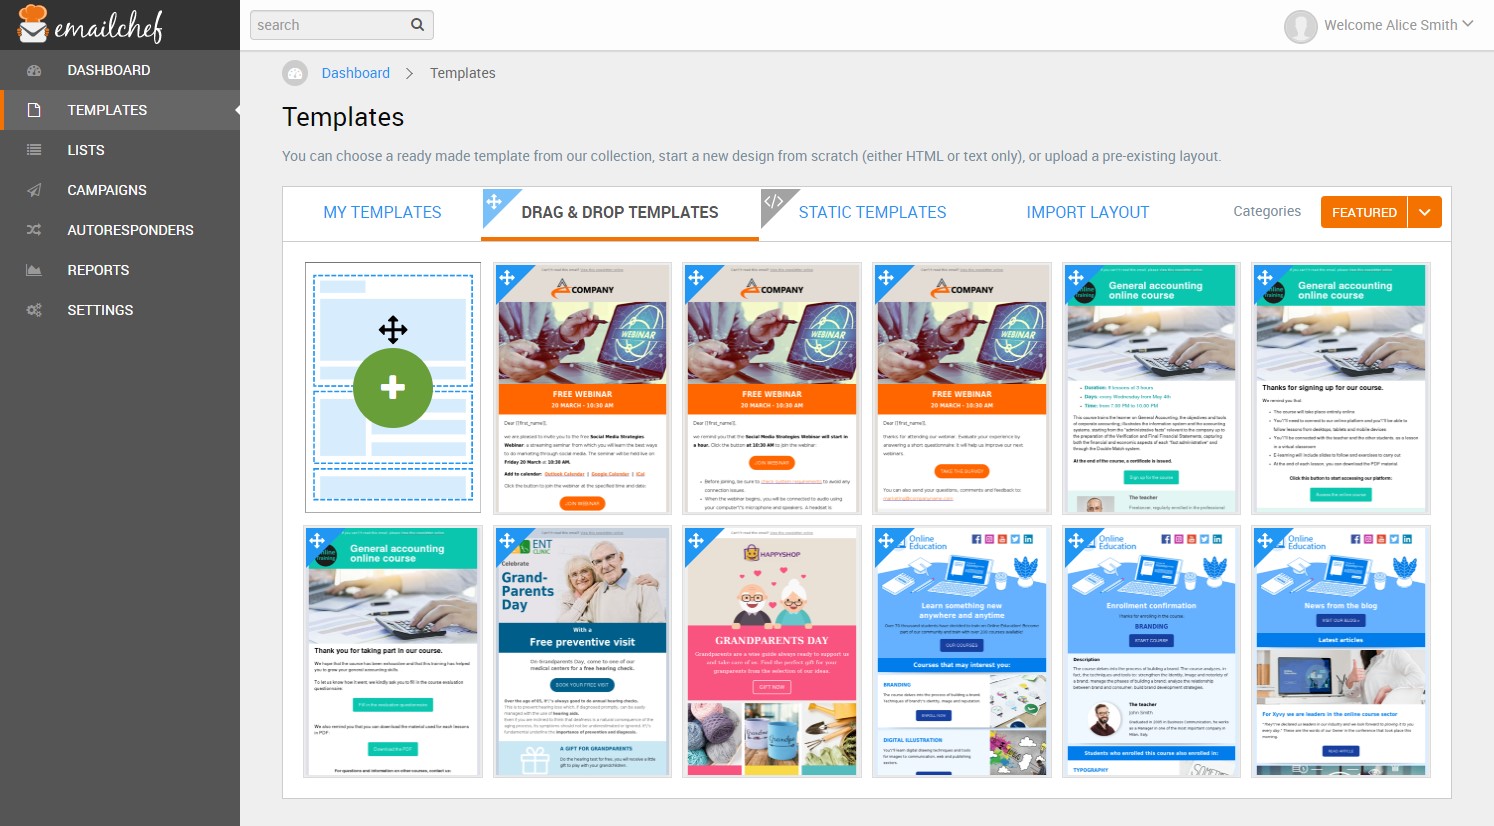
You can see how the layout looks in the drag & drop editor below:

You can add content and customize your email, for instance by uploading and placing new images, changing the font type and color, creating a bullet list, and of course, adding external links.
Once the newsletter is complete, you’ll just need to save and create your campaign. Choose the name and the subject, and specify the newsletter’s sender. (You can add a new address if necessary and choose an email address different from the sender’s).
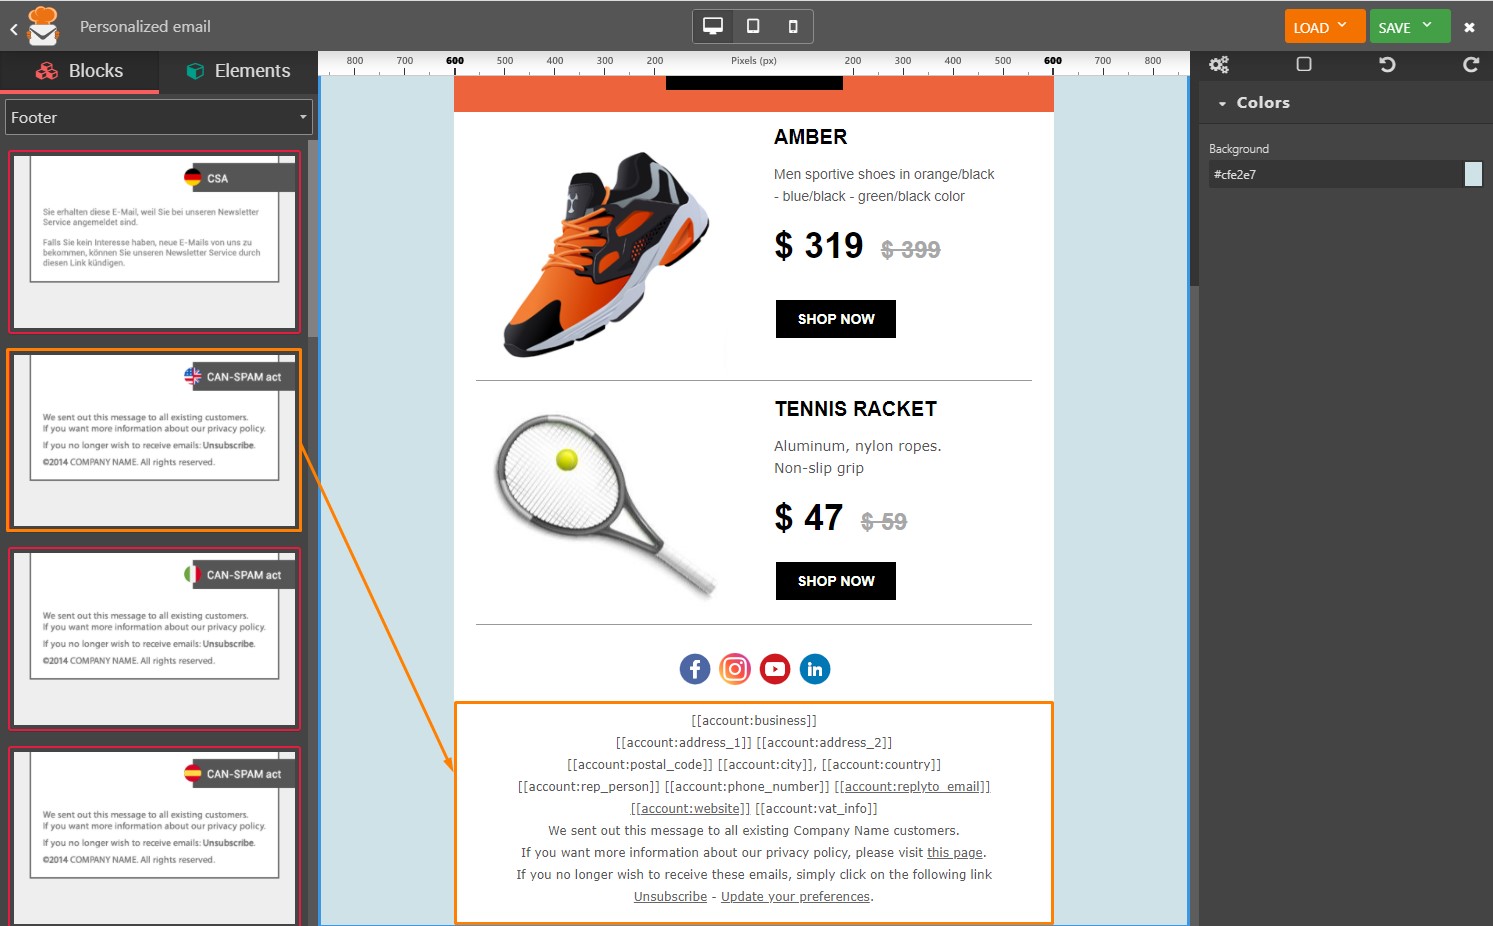
Please remember that at the bottom of your newsletter, Emailchef will add CAN-SPAM Act information and an unsubscribe link. It’s a placeholder that looks like this:

The placeholder will appear to your recipients based on the activity data of the sender you want to use.
This information is mandatory for you to be able to send your newsletters. You can insert the placeholders for the CAN-SPAM Act and the unsubscribe link in your template with the drag & drop editor. In the “BLOCKS” section on the right, select “Footer” and insert the block marked “CAN-SPAM Act.”
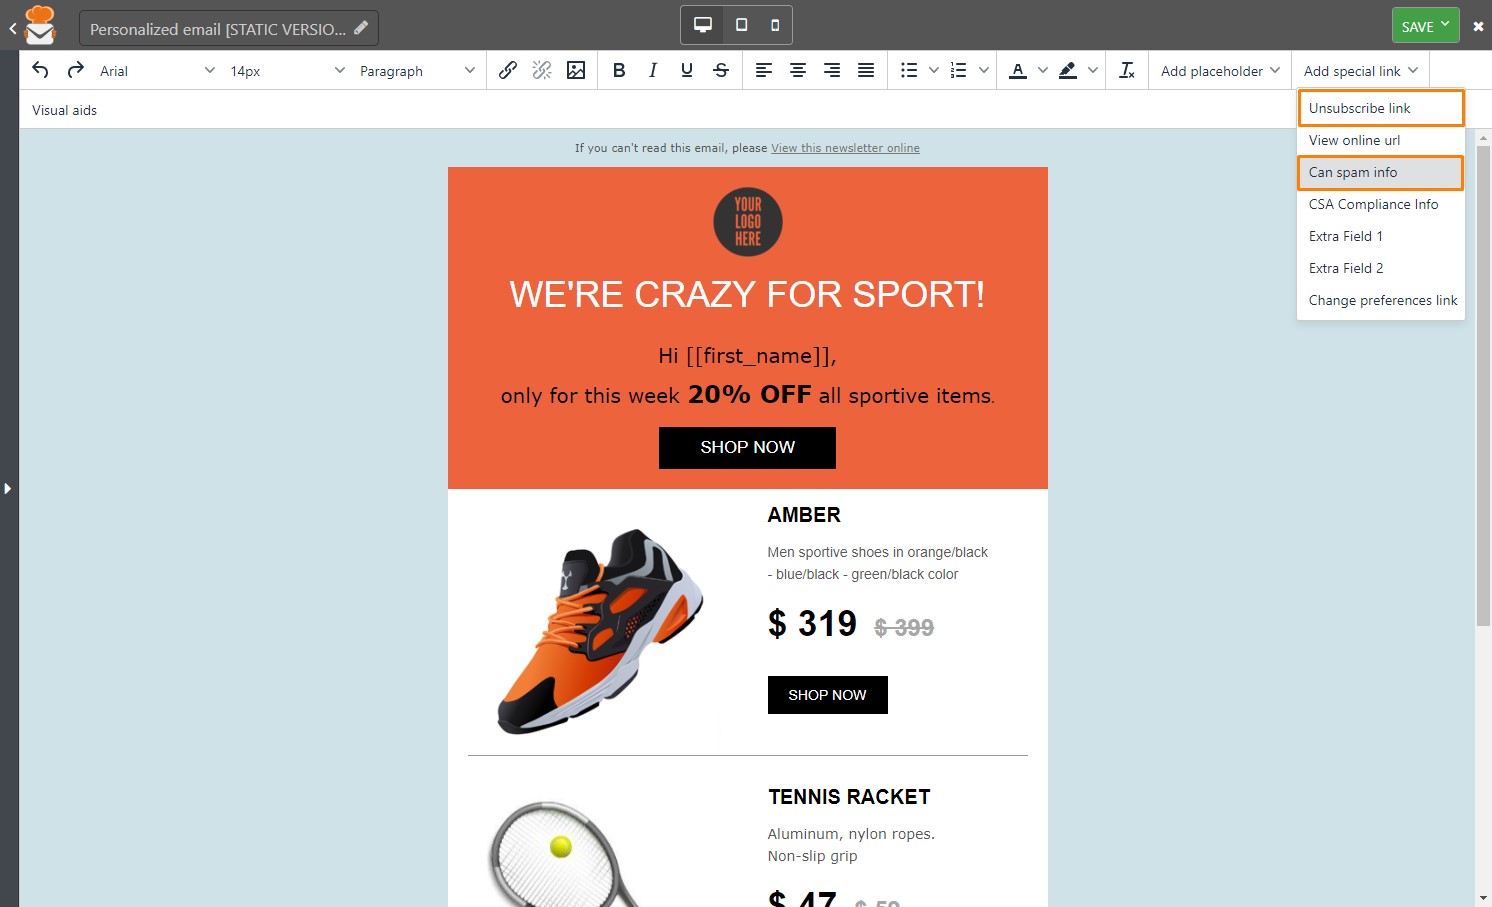
In a static template, you can add this information by using Emailchef’s static editor and selecting “Add special link”:
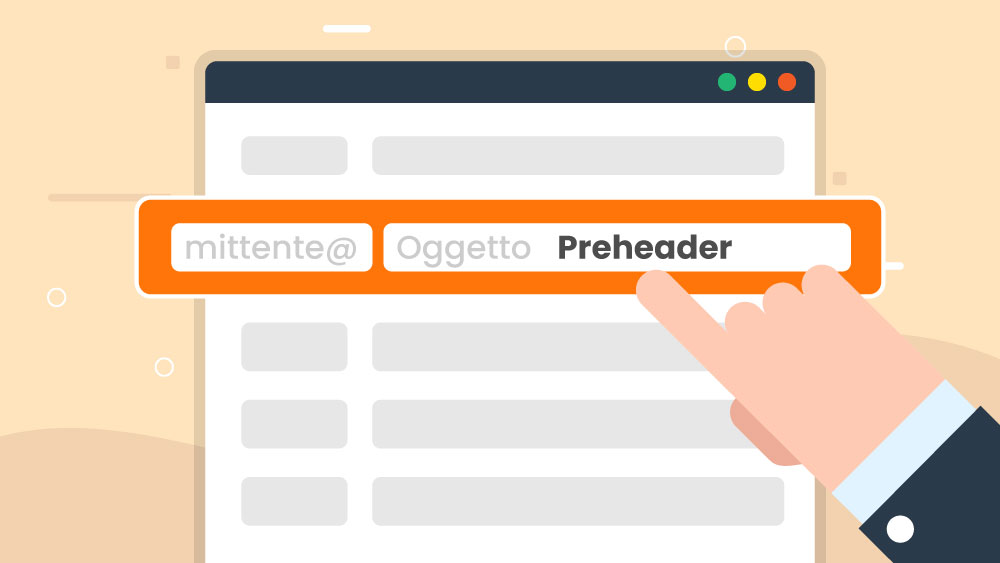
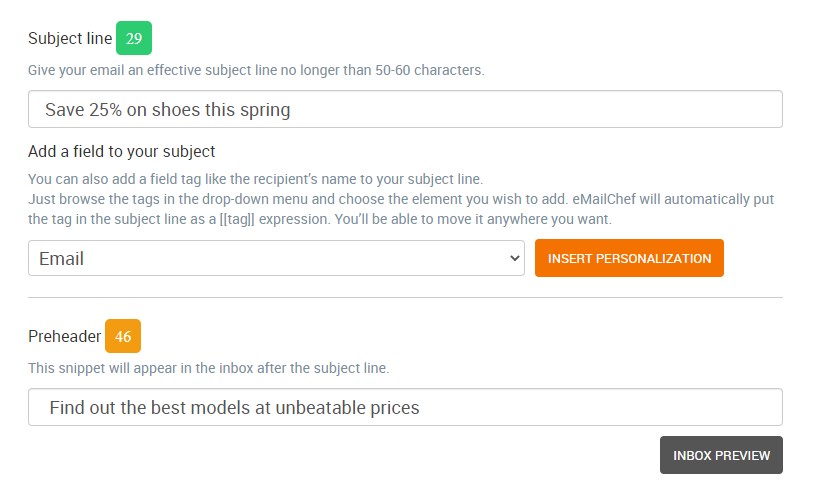
Your email will also need a subject line. Remember that the subject of your email should never exceed 50-60 characters and should intrigue your readers! You can also add a preheader, a short introductory phrase that will appear in the inbox following the subject:
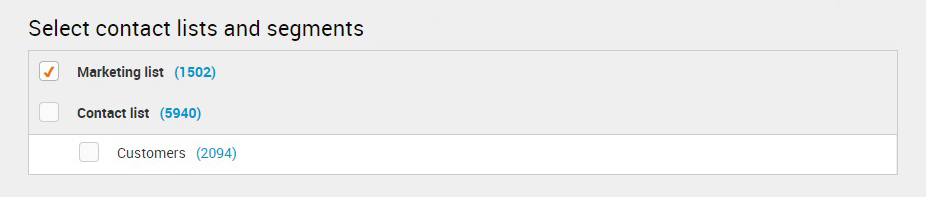
Next, select the newsletter’s list of recipients. In the example below, for example, you can see that we have chosen a list called “Marketing list”, consisting of “X” contacts:
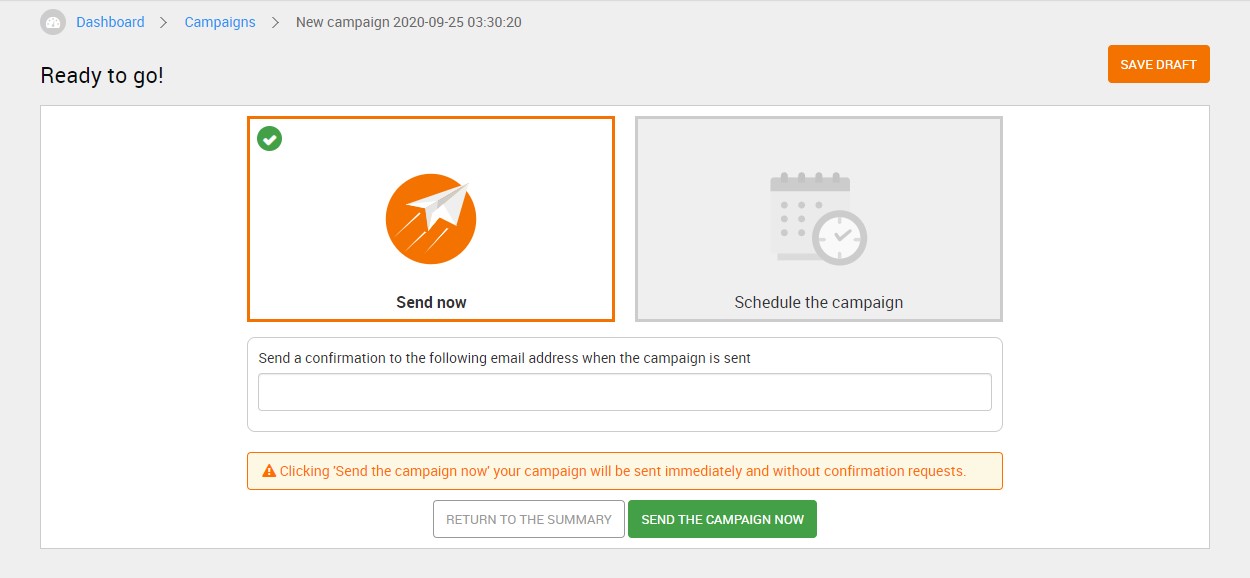
Now you’re ready to send the email. To avoid filtering issues, you should first run a spam check. In the Overview screen, click “Spam test.” Now you can either send your message immediately, or schedule the email for a later delivery.
4. Analyze the campaign
Once the newsletter has been sent, it’s time to check the results. Emailchef provides an accurate analytics tool, updated in real-time, to give you all the most relevant metrics about the interaction between your email and your subscribers.
Click “REPORTS” on the left menu, and select the campaign. (In this case, it’s your first):

As you can see, you will receive information about:
- Delivery rate (the number of emails correctly delivered)
- Open rate (the number of emails opened)
- Click-through rate (the number of link clicks your newsletter generated)
- Unsubscribe rate (the number of users who opted out of your list)
- Spam complaints (the number of users who labeled you as a spammer)
- Bounces (the number of messages rejected by the recipients’ incoming servers)
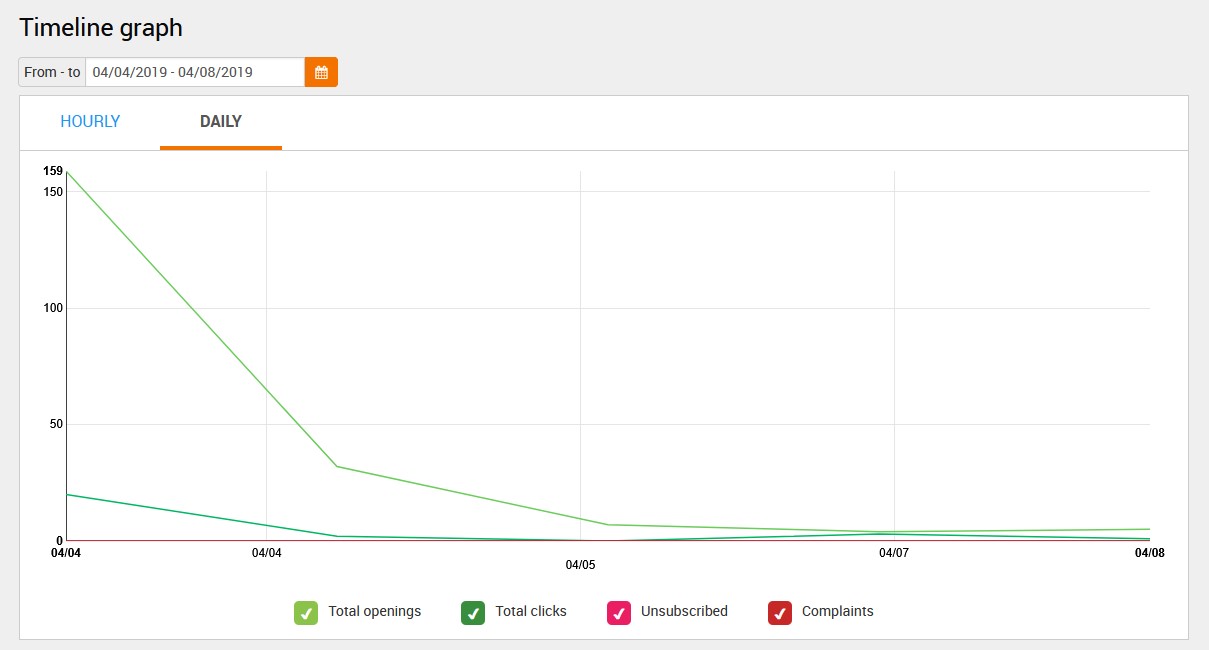
This line chart monitors the progress of the campaign over time. By selecting the items beneath the graph, you can track the trends of each statistic.
In the Statistics section you can also see each contact’s data in relation to each statistic. You can see exactly who opened the email and who clicked it, and so on, together with the date and time the action was performed.
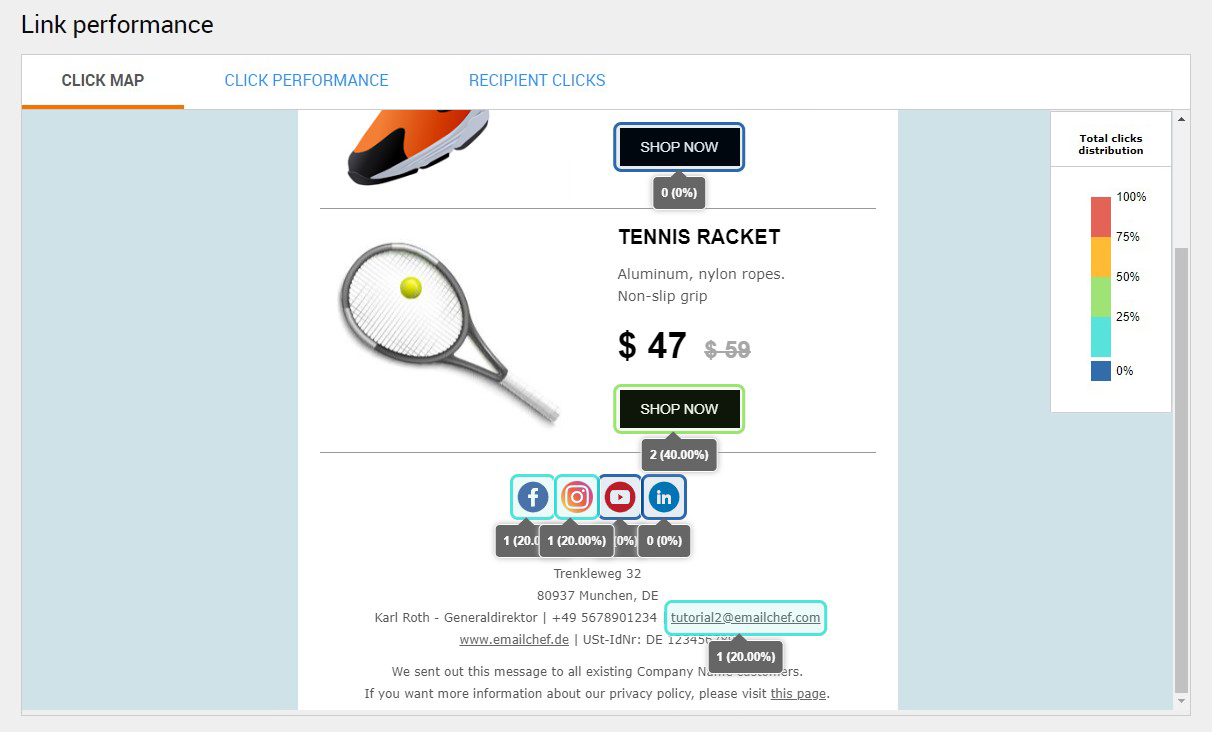
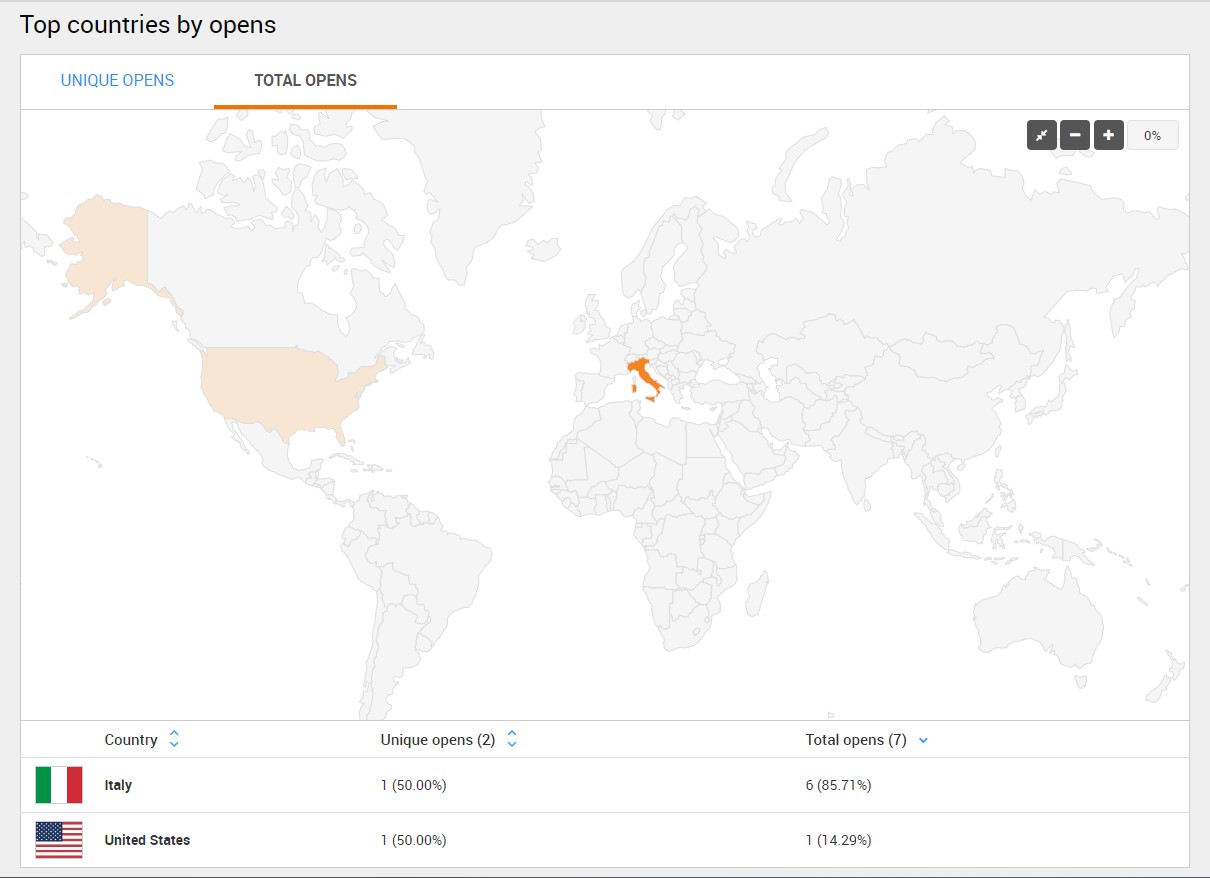
You will also be able to monitor the performance of individual links in your campaign, and see where in the world your email was opened:
All of this data is very valuable for improving future campaigns. For example, if you see that the opening statistics of your newsletter start to turn negative, you might want to rethink the subject of the email or change the day and time of sending. A very high number of bounces, on the other hand, means that you need to clean up your contact list, eliminating duplicate or incorrectly written addresses.
That’s all you need for a simple overview. We have shown you how easy and fast is to create, send, and analyze an email campaign with Emailchef, but that’s just the first step. To dig deeper into our system, you’re welcome to explore freely and take advantage of our full user guide.
Remember that we’re always happy to help and hear what you think.
![[EN] How to Start Sending Emails with eMailChef](https://emailchef.com/wp-content/plugins/wp-youtube-lyte/lyteCache.php?origThumbUrl=https%3A%2F%2Fi.ytimg.com%2Fvi%2F10HTkr5BEfw%2F0.jpg)